
Hardware Overview of the Arduino Nano 33 BLE Sense Development Board for Prototyping

In this article I review all of the hardware details for the Arduino Nano 33 BLE Sense, which is a great development board to use for a Proof-of-Concept prototype.
First, let me break down that name a bit for you.
The “Nano” is simply a family of Arduino boards that are very small, but the hardware used on each Nano board is totally different.
For example, the base Nano board still uses an older 8-bit microcontroller, whereas the Nano we’re talking about here uses a much higher performance 32-bit microcontroller.
The “33” in the name refers to the voltage level for the various I/O pins which is 3.3V. This is highlighted prominently in the name because older Arduinos all had a I/O voltage level of 5V.
If you connect a 5V output signal to an input pin on the Nano 33 series it will damage the pin on the Arduino, so they highlight this in the name to try to prevent that from happening accidently.
This “33” is also an indicator that the board uses a 32-bit microcontroller.
Next, the “BLE” refers to the fact that the board offers a built-in Bluetooth Low-Energy (BLE) radio which can be used to communicate with a mobile app or other devices.
Finally, the “Sense” differentiates this board from the “Arduino Nano 33 BLE” which uses the same microcontroller but doesn’t include all of the extra sensors.
Both boards include a 9-axis Inertial Measurement Unit (IMU) sensor, but the Sense version adds on lots of additional sensors.
Initially, the Nano 33 BLE and the Nano 33 BLE Sense used the exact same PCB design, and they simply left the sensors unpopulated on the Nano 33 BLE.
However, Arduino later created a Rev2 of the Sense board that uses different sensor components, so the Rev2 Sense board now looks different than the non-Sense version, although both have the same footprint.
BLE Module
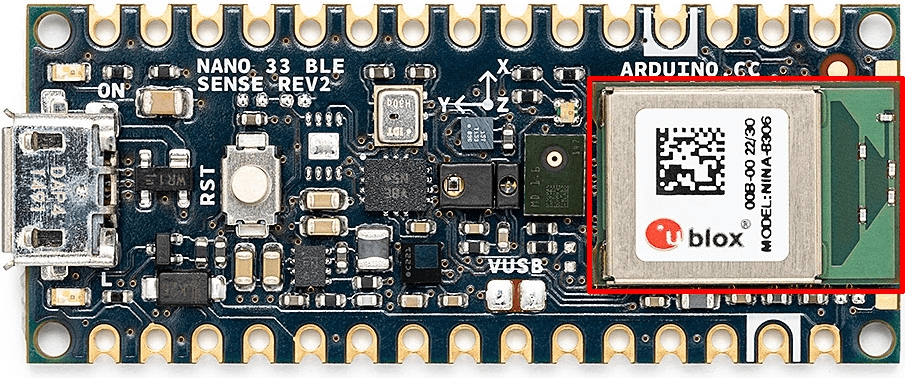
The core functionality of this board is a Bluetooth microcontroller module called the NINA-B306 from a company named uBlox.
uBlox is a popular manufacturer of lots of different wireless modules.
Just like with this Arduino board, the majority of commercial products will use similar modules for any type of wireless functionality.
Modules for wireless functions are so common because you can purchase them already tuned, tested, and pre-certified.
Designing a custom wireless radio is complex, requires expensive testing and tuning equipment, and it’s expensive to get FCC certified for emissions.
But you can bypass a lot of these issues by using a pre-certified wireless module like this one.
Although, using a pre-certified wireless module does not allow you to entirely bypass emissions requirements, it just greatly simplifies it.
At the heart of this module, hidden under the metal shield, is the Nordic nRF52840 Bluetooth microcontroller.
Nordic Semiconductor is one of the biggest manufacturers of Bluetooth microcontrollers, and one of my favorites.
This is a 32-bit Cortex-M microcontroller that consumes very little power since by default Bluetooth Low-Energy is commonly used in very small IoT devices that are powered only by a single coin cell battery.
This module also includes a built-in PCB antenna which is the green rectangle just to the right of the metal case. This antenna is sufficient for most applications not requiring longer range Bluetooth operation.
Using a wireless module with a built-in antenna even simplifies FCC certification more which ultimately saves you time and money.
BMI270 Accelerometer + Gyroscope
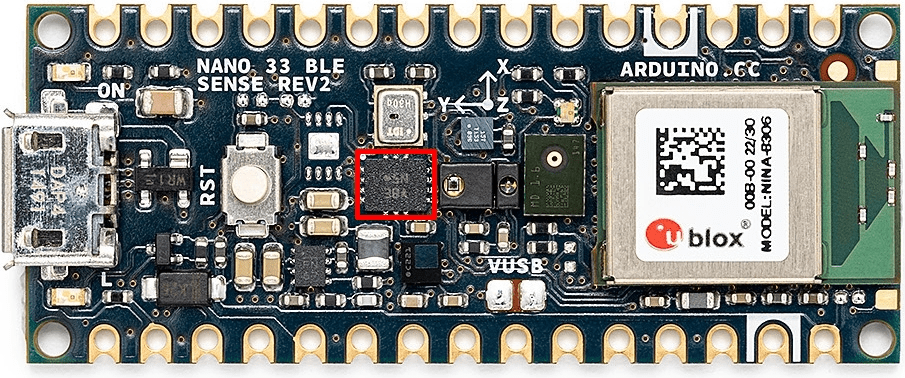
The BMI270 has two separate sensors called an accelerometer and a gyroscope which can measure acceleration and orientation in 3-dimensions. Together, they are referred to as a 6-axis inertial measurement unit,or IMU.
An accelerometer measures linear acceleration. Ever wonder how your phone detects if it is being held in portrait or landscape mode? That’s thanks to using an accelerometer.
In this case your phone actually measures the direction of Earth’s gravity (i.e. acceleration) so it knows what is up and down.
Some other common uses of an accelerometer are to detect an impact such as a car crash, or to detect if a device is currently falling and about to have an impact.
The gyroscope sensor allows you to measure angular or rotational orientation and velocity. A common application for a gyroscope would be in a drone.
Interfacing with the microcontroller
So how does the IMU communicate with the microcontroller?
There are various serial protocols used for communicating between different components on a PCB. The two most common by far are SPI and I2C.
I2C only requires two wires, whereas SPI requires 3-4 wires. The advantage of SPI is it’s faster than I2C.
But the advantage of I2C is its simplicity, and the fact that it’s a bus protocol. That means multiple devices can share the same two lines, with each device having its own special address so only the intended devices can communicate on the bus at one time.
When it comes to simple sensors like on this board, except for the microphone, I2C is usually the best choice.
The BMI270 offers both SPI and I2C for interfacing with the core microcontroller.
BMM150 Magnetometer
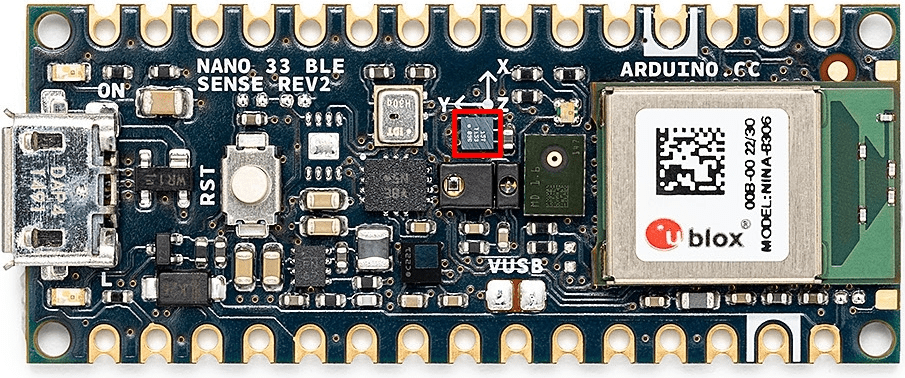
As the name implies, the BMM150 magnetometer measures magnetic fields and is most commonly used as a compass.
Just like the accelerometer and the gyroscope, the magnetometer operates in 3-dimensional space, so all three of these sensors together are referred to as a 9-axis IMU.
In many cases the accelerometer, gyroscope, and magnetometer will all be embedded on the same sensor chip, but in the Arduino Nano 33 BLE Sense, they decided to use two separate chips.
Like the previous sensor, this chip also offers both SPI and I2C for interfacing with the core microcontroller.
HS3003 Humidity / Temperature Sensor
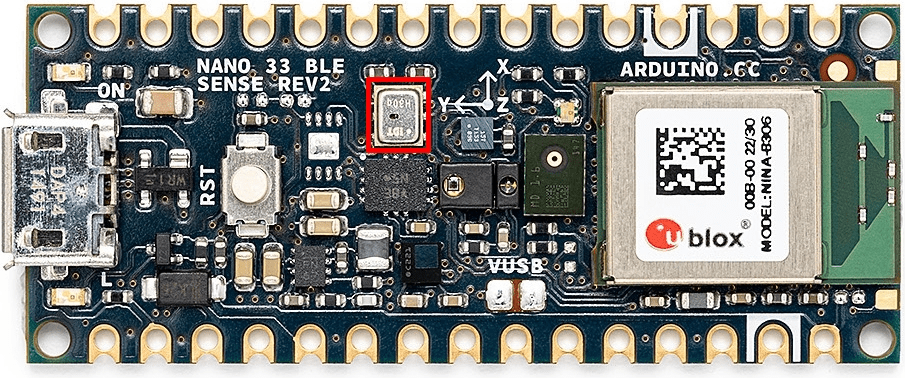
The HS3003 sensor measures both humidity and temperature. There’s a small hole on the top of the sensor which allows access to the ambient air for measuring the humidity.
This particular sensor only offers an I2C interface, and SPI would be overkill for such a simple sensor with such low data rates.
LPS22HBTR Barometric Pressure Sensor

If you are building a product that needs to measure altitude, or forecast the weather, then you will need to use a barometric pressure sensor such as the LPS22HB from ST Microelectronics shown above.
This sensor also offers both SPI and I2C for interfacing with the microcontroller.
MP34DT06JTR MEMS Microphone
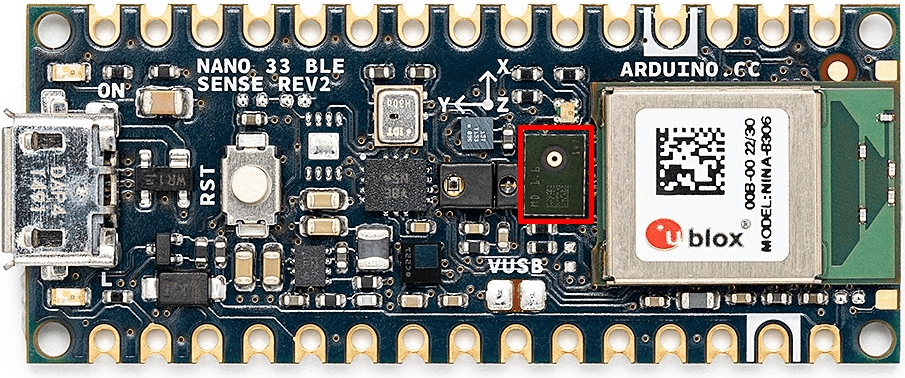
The microphone on the Arduino board is a very small digital microphone from ST Microelectronics and is located right next to the BLE microcontroller module.
Like many of the sensors on this board the microphone is built using what’s called a MEMS process, which stands for Micro-Electro-Mechanical-Systems.
This is a process technology that allows the integration of very small electrical and mechanical components both on an integrated circuit.
This microphone is even digital so the analog-to-digital conversion already happens inside and it provides a digital output signal in what is called Pulse Density Modulation (PDM) format.
One advantage of a digital microphone is it’s much simpler to design with, and it’s less likely to pick up noise from other electronic circuits on the board like with analog signals.
APDS-9660 Light / Proximity / Gesture Sensor
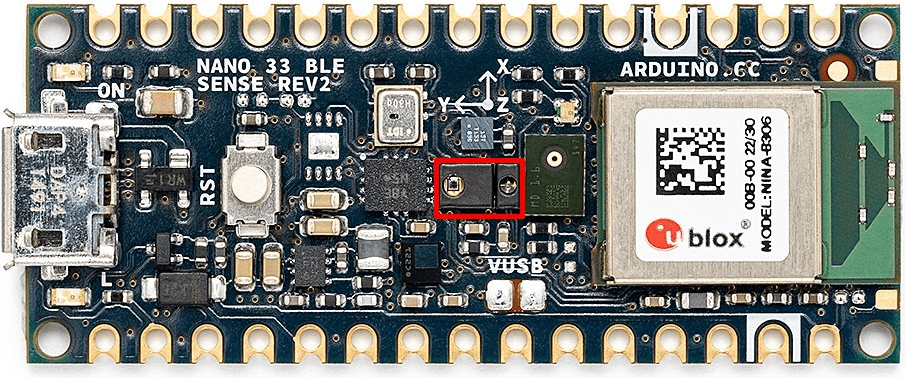
The last sensor I’ll talk about is the Broadcom APDS-9660 which is a very versatile RGB light sensor which can be used to measure ambient light, detect object proximity, detect color, and serve as a gesture sensor.
This sensor interfaces with the microcontroller using the I2C interface.
MP2322 Step-down Buck Regulator
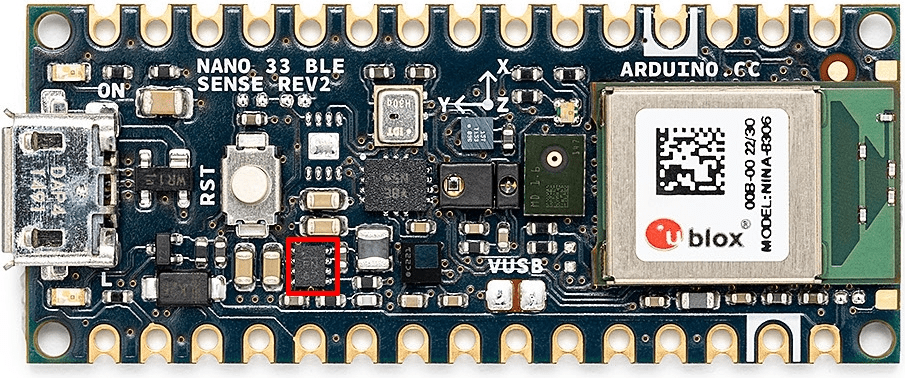
On the Arduino Nano 33 BLE boards you also have the power regulator chip which takes the input voltage and steps it down to a lower voltage that the microcontroller and sensors can use.
This type of regulator is known as a switching step-down regulator. The one chosen for this board is the MP2322 from Monolithic Power.
The main thing to keep in mind is that a switching regulator excels at power efficiency which is really critical when stepping down a high voltage input supply to a lower voltage.
This Arduino board has a maximum input voltage up to 21V and this regulator steps it down to only 3.3V.
If the maximum input voltage were much lower, say only 5V, then a linear regulator would have been a better choice, since they are simpler and cheaper.
What’s Left
The final chip is called an authenticator. This is a secure EEPROM memory chip that allows you to safely store private security keys. These private keys are used for making wireless communication over the BLE radio secure.
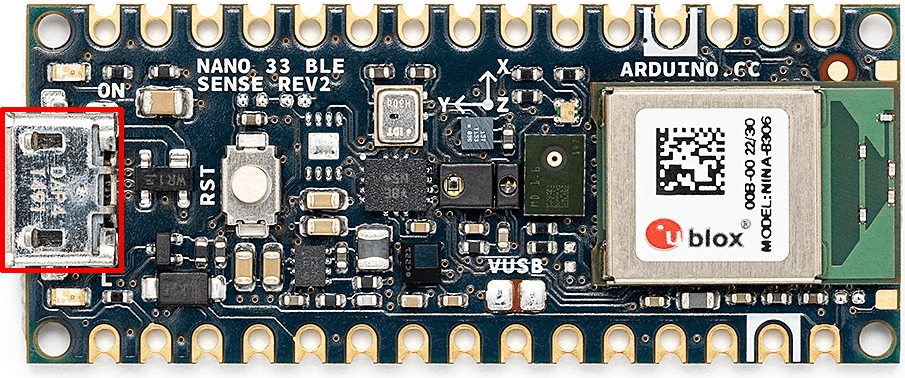
There are also two onboard LEDs located on each side of the USB port as shown below. One of these LEDs is used for indicating the board has power.
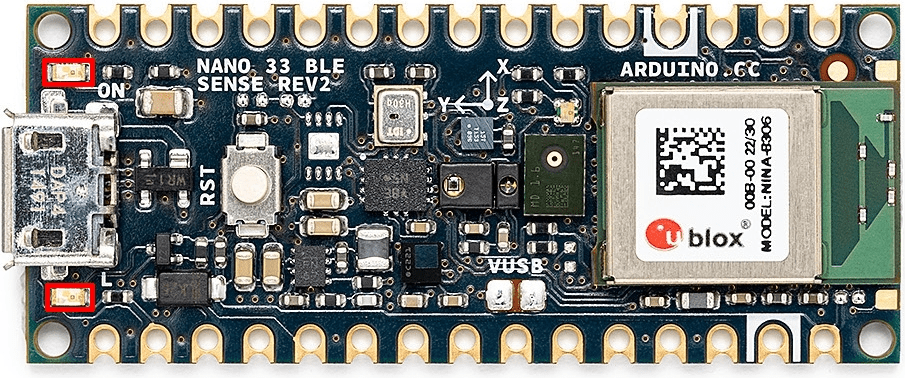
Then, there’s a small push button which is used to reset the microcontroller.

Finally, there’s the USB port that you will use to connect to a computer for programming.
Conclusion
If you are building an early prototype of a product you wish to commercialize, and you like the simplicity of using Arduinos, then the Arduino 33 BLE/Sense makes a fantastic choice for your proof-of-concept prototype.
Unlike most other Arduino boards which use outdated yet expensive 8-bit microcontrollers, the Arduino Nano 33 series of boards use a much more capable 32-bit microcontroller that even includes a Bluetooth Low-Energy radio with a built-in antenna.
These types of 32-bit microcontrollers are typically a much better choice for a commercial product than the older 8-bit ones used in popular Arduino boards like the Uno and Mega.
