
How to Create a Graphical User Interface (GUI) for Your Product
This article explores the different types of LCD touch displays, communication protocols, and the various software options for designing and building a graphical user interface.

Today, many embedded systems are expected to have touch screens for the user to interact with the device.
The user interface needs to be easy to use and have fast response times. It is critical for any hardware/software designer to use the right kind of technology for their LCD displays as well as the right design for their user interface.
LCD Touch Displays
Capacitive touch screens
The most prominent kind of LCD displays are capacitive touch displays. More specifically, a projected capacitive display is the one most often used in cell phones and tablets.
These displays have a layer of electrodes in between the glass and the touchscreen to sense conductivity (such as your finger when it touches the display).
The benefits of having a capacitive touch screen include a much smoother experience for the user, as well as multi-touch support for things like zooming in or panning if your device needs those features included.
However, capacitive touch screens do not work if the user is wearing gloves that are non-conductive.
Resistive touch screens
Resistive displays operate very differently from capacitive touch displays. These displays have a small gap between a thin layer of plastic and a glass pane.
Therefore, these displays require more force to operate since the thin layer of plastic needs to touch the glass pane for the microcontroller to recognize touch coordinates.
This type of touchscreen is more suited for a manufacturing environment, or any sort of workplace where gloves are often used, since the user can use any object to apply pressure on the screen to get feedback.
Display Communication Protocols
The technology used for touch screens needs a way to communicate with your microcontroller/embedded system.
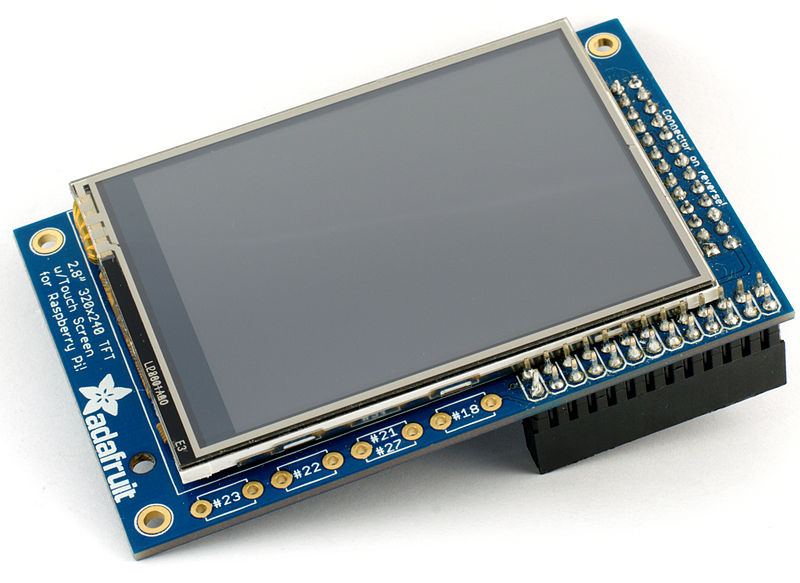
SPI
SPI stands for Serial Peripheral interface, and offers a nice amount of speed for relatively low complexity boards.
With SPI, there is a master and a slave device, where the master acts as the “controlling device,” and the slave acts as the “receiving device.” The master device is usually a microcontroller, and the slave device is usually a sensor, or in this case a display.
There are four main lines to SPI. The MOSI (Master Output/Slave Input), the MISO (Master Input/Slave Output), the SLCK (Clock), and the SS/CS (Slave select/Chip select).
The SPI is popular to use with smaller screens where the refresh rate is not too high and neither is the resolution (typically around 480 x 360 pixels).
The simplicity of the interface means that a smaller, less powerful microcontroller can handle communication at ease, and you as the developer only need some buttons on the screen for basic input/output.
However, if you need something more complex, nicer graphics, or a larger display, you can work with DSI.
Digital Serial Interface (DSI)
DSI stands for Digital Serial Interface, and it is most popularly used to reduce the cost of display controller technology on mobile and embedded devices.
The Mobile Industry Processor Interface Alliance (MIPI) developed it for this exact reason.
Other interfaces such as RGB and parallel (which are not discussed in this article) require a higher number of pins for a high-resolution display, whereas the DSI standard requires only a few pins and maintains the same advantages for high resolution and high refresh rate displays.
The DSI standard operates with two levels: interface and packet levels. The interface level is used for low level communication, where the user can control the display’s power and speed settings.
On the other hand, the packet level is used for sending image data (from 4 bytes as a short, to 6 bytes as a long).
The interface level has a variety of modes, including low power, ultra-low power, and high speed.
These modes are useful when you need to either conserve battery life on, for example, an IoT device, or you want the highest speed possible for a smooth frame rate. The packet level is used for indicating the packet size and error correction codes.
While DSI has it’s benefits, it is a closed interface so you will need to pay to use their interface in your product.
However, there are plenty of development kits that already use this interface, or adapters that you can implement in your product.
HDMI
The High-definition multimedia interface (HDMI) is one of the better and most common options for high-end displays for your embedded system.
This interface is typically used for embedded Linux products with high-end microprocessors, unlike typical microcontrollers that use either bare-metal or RTOS.
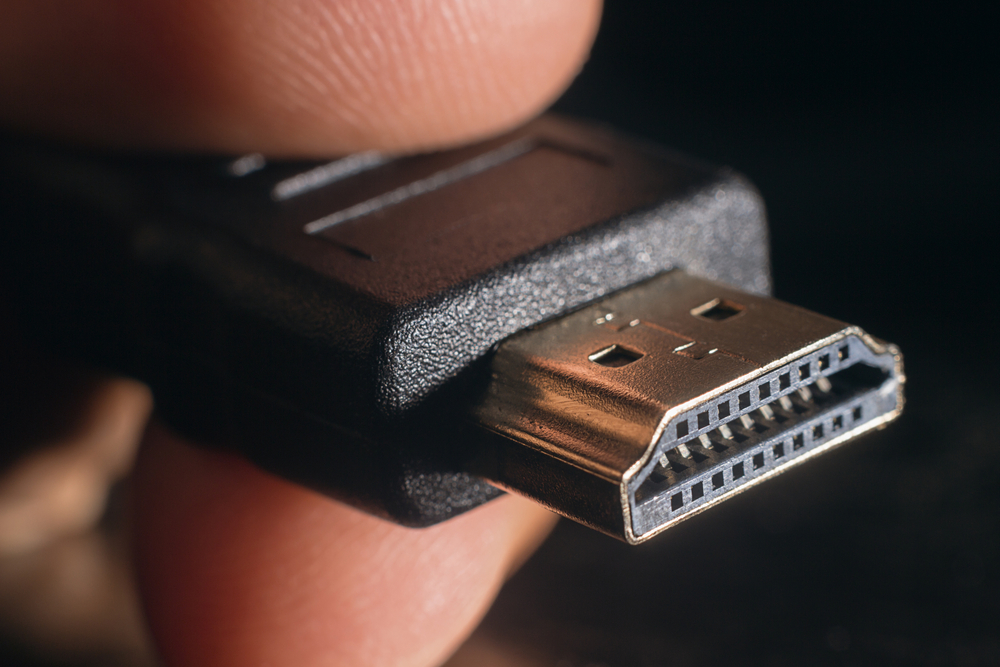
HDMI works by combing both video and audio components into one cable. It requires 19 pins, which is way more than both DSI and SPI interfaces.
It uses a process of encoding data called Transition Minimized Differential Signaling (TMDS) to minimize the chances of quality loss or degradation.
It also uses High-Definition Digital Protection (HDCP), therefore your data is protected while your embedded device is displaying information. This is crucial for any industrial, military, or aerospace applications.
Software for Creating Embedded Graphics
Having screens connected to your device is crucial, but it is equally important to have software that allows you to design and build graphical user interfaces for the user.
Qt Creator
Qt is one of the most popular integrated development environments for professional level graphical applications.
Qt is used in automotive, industrial, and aerospace industries, where timing, performance and design are critical, and you need a smooth user experience.
Qt can function on a variety of different frameworks and a plethora of devices, such as microcontrollers, microprocessors, phones, and even desktops.
The language used to develop in Qt is mainly C++, but it also uses QML as a “markup language” for a lot of the graphical design components when using the editor.
It supports application layer protocols such as HTTP, TLS/SSL, FTP, and DNS right out of the box, which means you can easily use Wi-Fi or Ethernet with your display.
The amount of abstraction possible to achieve with Qt makes it a great contender for building fast to market embedded devices with little to no hassle (compared to bare-metal programming).
However, this does come with a cost if you wish to use it in your product. There are free versions if you want to just learn the platform.
But once you start selling your product, you will need to make sure the license you are using outlines that you can sell Qt on your embedded device.
Crank Software
A very powerful and user friendly integrated development environment for MCU development is Crank Software’s Storyboard GUI.
Storyboard is similar to Qt, but is more user friendly for those who are not as comfortable with coding.
Storyboard offers imports from Photoshop, which make it incredibly easy to move designs back and forth. If an icon has certain shading and lighting, those exact features will show in Storyboard. You can also integrate 3D models such as .obj files and even .fbx files.
Storyboard offers it’s solutions to a ton of operating systems, similar to Qt, which means you can cross-compile and not have to worry about making your code for only one device.
This is especially important if your supplier runs out of stock for your microcontroller/microprocessor and you need to completely alter your PCB/embedded device.
Storyboard also offers their “Embedded Engine,” which is software within Storyboard that optimizes performance for your microcontroller/microprocessor, OS (freeRTOS, Linux, etc.) and display rendering technology (frame buffers onboard or not, etc.).
However, like Qt, this software is proprietary and in order for it to be used in your product you will likely need a license.
TouchGFX Designer
TouchGFX is a GUI tool made by ST Microelectronics. This platform is suited for a device that uses any of ST’s products, such as the popular STM32.
The tool works very similarly to both Qt and Storyboard, but offers less flexibility and less options.
It is mainly used to optimize for performance on STM processors, but if you plan on only using this kind of processor for your product, this can be a good option.
LVGL
LVGL stands for light and versatile graphics library. This library is perfect for low memory microcontrollers and smaller projects, as it can fit easily onto an MCU with only 64kB of flash and 8kB of RAM.
The library also supports a multitude of platforms, including STM32, PIC, ESP32, Raspberry Pi, and others. Languages used to write with this library include mainly C (C++ supported) and even Micro Python.
The biggest advantages of the library are that it is free to use, has a small footprint, and has a beta version of a GUI builder, like the TouchGFX Designer and Qt.
There are lots of examples and the open-source community provides lots of flexibility down the road if the product ends up progressively getting better, or you as a developer want to contribute to open source.
The only downsides include difficulty with making very complicated and smooth GUIs, as well as making it versatile among different products, whether it is different processors or a different OS. You will need to redesign the code if you wish to implement it onto another device.
It is also a simple library, which means if you intend to use it with an operating system or even an RTOS such as freeRTOS, it won’t take up much space or interrupt other tasks if you set it up to be thread-safe.
In other words, LVGL simply copies an array of pixels into a given area of your display using one driver. It supports TFT displays, HDMI, SPI, and USB.
In addition, you can also use a variety of inputs for the display, not just a touch screen which is more expensive than a regular display.
These include a touchpad, mouse, keyboard, encoder, or a keyboard or keypad that works while wearing gloves.
Conclusion
To quickly summarize, we have reviewed the two types of touchscreen displays: capacitive and resistive touch. Then we discussed three of the more popular communication protocols used for displays, including SPI, DSI, and HDMI.
Finally, we have reviewed various software tools available to help you create the actual embedded graphics for your interface.
