
Product Development Timeline: How Long It Takes to Develop a New Hardware Product
Everyone wants to know, how long will it take to develop my new tech product? It will most certainly take longer than you expect or want, however this article will help you to more accurately forecast your development time frame.

One of the most frequent questions I am asked is, “when can I expect to have my product ready to go on store shelves?”
This is a complex question with one simple answer: much longer than you think it will take, regardless of how much experience you have. But this article will definitely help you narrow it down more precisely.
The two key variables that will determine how long it takes you to get your product to market are the product complexity and you. This includes your skills, your money, your available time, your motivation, and so on.
A simple product, by a highly skilled founder, who has lots of time and motivation, is the quickest case to market. The slowest case is a complex product, from a founder without many relevant skills who has very little time available to work on it.
In this article we are going to break down all the stages of product development to create a rough timeline.
This will help you to more realistically forecast when your product will reach the market.
Keep in mind though that these are all rough estimates. There are too many variables to ever forecast exactly how long it should take to develop your product.
If you are taking longer than the times I specify, do not beat yourself up!
How fast you are is not what is most important, and rushing is never wise. The important part is your refusal to give up, and your will to just keep pushing and pushing to make it all happen.
Having a hardware startup is a long game. In most cases it will take you a couple of years to get your product on the market in a significant way (beyond just small sales tests).
Stage 1: Electronics Development
Develop system block diagram
Time to completion: As little as 1 hour, as long as a few weeks.
A block diagram allows you to see the over system architecture without getting lost in the details necessary for a full schematic circuit diagram. It allows you to see a bigger picture of the product design without all of the details.
How long this step will take highly depends on the level of detail already specified in your product definition document. If the product definition is thorough then creating the block diagram may only take a hour or so if you are a skilled developer.
On the other hand, if you are still figuring out your product as you develop the block diagram then it will of course take much longer.
Select the critical components
Time to completion: 1 to 4 weeks
Most developers tend to group the system level design, the selection of the components, and the schematic circuit design all together into a single step. But it’s much better to split this up into three discrete steps.
Selecting all of the critical components for your product (microchips, sensors, displays, etc.) before you begin the schematic design is critical because the components selected have such a huge impact on your future profit margins.
If component selection is done as part of the schematic design, then I find only the component technical specifications get priority. The component cost, availability, and tech support are usually neglected.
The cost of these components will be a major part of your product cost so they deserve to have their own step in order to get the attention they require.
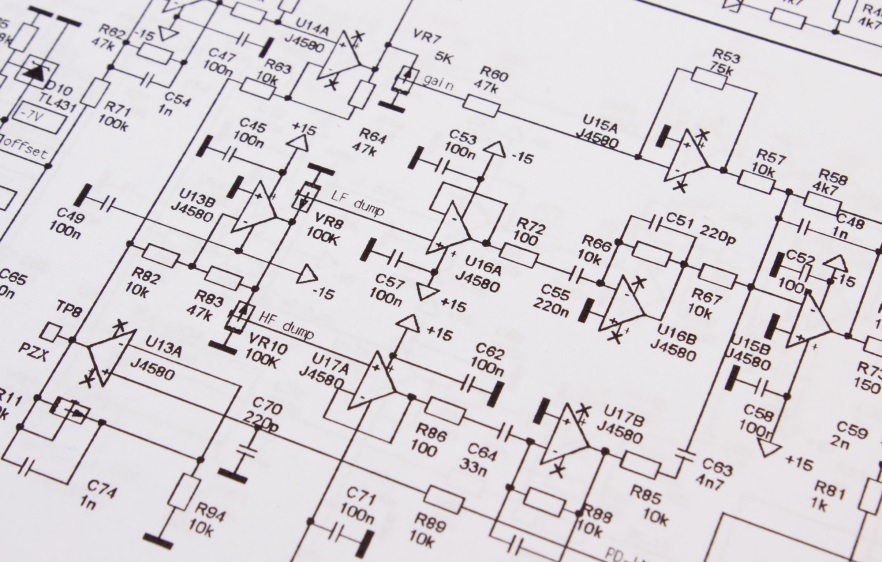
Develop schematic circuit design
Time to completion: 2 to 5 weeks
A schematic circuit design is a visual representation of the components and interconnections used in your electronic circuit.
By this point, you’ve already selected all of the components so it’s mostly a matter of adding the necessary support components (resistors, capacitors, inductors, crystals, etc.) and connecting everything together.
Once you have the schematic design completed your design software will give you the option to output a Bill of Materials (BOM). The BOM will list every single electrical component (diodes, transistors, etc.) used in your schematic circuit design.
The BOM will be used to eventually determine your total production cost per unit and will be a core document for manufacturing. I suggest you start estimating your manufacturing cost as soon as possible.
In fact, you should begin estimating your manufacturing cost as soon as you’ve selected all of the critical components.
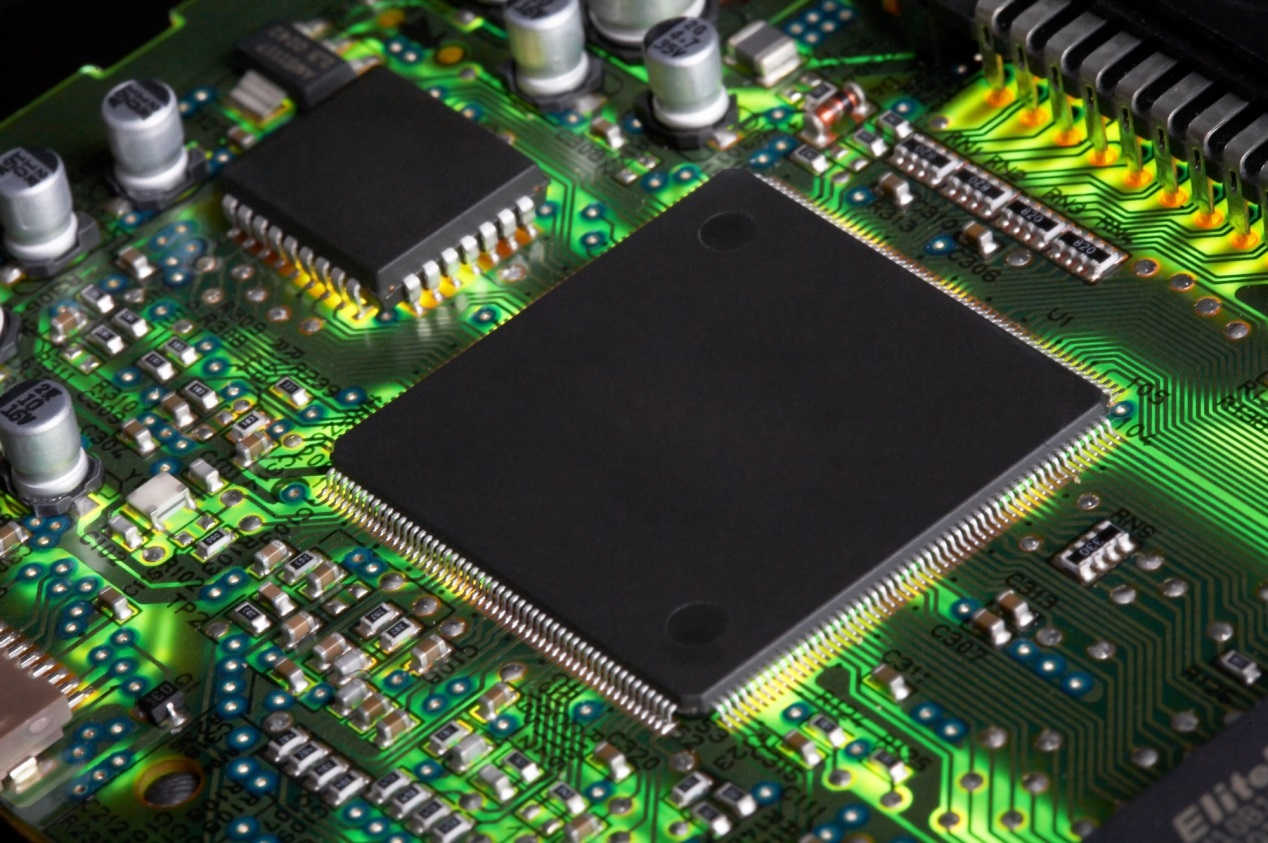
Design the Printed Circuit Board (PCB)
Time to completion: 2 to 5 weeks
The schematic diagram is just a conceptual drawing of your design. Now it’s time to jump into the real-world by designing the Printed Circuit Board (PCB) layout.
The PCB layout will be designed using the same software used for the schematic diagram.
Three types of designs will add considerable complexity and time to the design of the PCB layout. This includes custom wireless design, high-speed microprocessor design, and high-power design.
If your product falls into any of those three categories then expect it to take longer to design your PCB.
To learn more about PCB design be sure to watch this free tutorial and check out this in-depth paid course which teaches you every step of PCB design.
Independent design review
Time to completion: 1 to 3 weeks
Once you have a completed PCB, you should seek out an independent review of the design. It is always a good idea to have another engineer evaluate the design for errors.
You absolutely need to look for any potential problems in your design before you move on to the next stage.
This may cost you a couple of weeks now, and maybe a few hundred dollars, but it will save you potentially months of time, and thousands of dollars in the future.
One rule of product development is that the earlier you can catch a problem the faster, easier, and cheaper it is to correct.
Expect it to take 1 to 3 weeks to find an engineer, and to have them complete a review your PCB.
In the Hardware Academy you can get affordable feedback on your design from lots of expert engineers, including myself. We can also help you to find ways to simplify your product to lower your development, prototyping, certifications, scaling, and manufacturing costs.Order PCB prototypes
Time to completion: 1 to 2 weeks
After the design review, and if there are no changes required, you will order your initial PCB prototypes. It usually will take a couple of weeks to get your boards.
Rarely do I advise paying for any kind of expedited service. A week here or there is not going to make a significant impact. Remember, this is a very long game.
The only time expedited service may be advisable is if you have committed to a specific delivery date for a large customer or have a deadline like a tradeshow approaching quickly.
Develop firmware and/or software
Time to completion: 1 to 6 months
While you are waiting for your PCB prototypes, you can work on any firmware or software required. In fact, thanks to the wide availability of development boards you can begin developing your firmware before your hardware design is complete.
The time required for this step greatly depends on the software complexity. For example, a simple Bluetooth sensor that reports temperature will be many times less complex than an application requiring machine vision.
The time required of course also depends on whether your product also requires a mobile application or custom PC software.
For a mobile application, similar to the product enclosure, the development time significantly increases if appearance is critical. This necessitates a lot of back and forth between you and the developer which adds a lot of time and expense.
Evaluate and debug PCB prototypes
Time to completion: 5 weeks, most likely more
Once you receive your initial PCB prototypes, you need to thoroughly evaluate them. Chances are they will need to be revised.
Most PCB’s will need some sort of tweaking and editing. I have never seen a design come out exactly right the first time, even when I worked for a large company like Texas Instruments. That’s why big companies plan for a lengthy debugging process.
So expect, and plan for, the debugging process. But, this is commonly one of the most challenging steps to accurately forecast. Obviously, any problems you encounter are a surprise – otherwise you would have fixed them already.
Since you can’t know what your exact problems are ahead of time, plan for it take at least five weeks to debug your PCB.
Remember, it takes another couple of weeks to order a new, revised PCB. Then, you begin the debugging process all over again until you eventually obtain a fully working PCB. The more iterations of PCB prototypes that you need, the longer this stage will take.
Stage 2: Enclosure Development
People are often surprised to find out that the development of their product’s plastic parts can be just as time consuming as the electronics. How long this stage will take depends on various factors, so let’s start with the basics.
Create 3D computer model
Time To Completion: 1 to 6 months
First, you need to create a 3D computer model of any and all plastic parts required for your product. Usually, this will at least be some kind of plastic enclosure to encase your electronics.
Expect to spend at least a month on the 3D model, but as much as 6 months if the design is complex and appearance is critical.
This may sound like a long time compared to other tasks. How long enclosure development takes for your product highly depends on how critical the appearance is for your product is.
Do you need to focus on achieving a “cool look” for your product? If so, this will take a lot longer than if you use a simple enclosure.
Can you do the 3D modeling work yourself? If so, this may drastically speed up the enclosure development if appearance is critical. I did this for my own product and found it allowed me to create the product I envisioned much faster.
But of course, learning 3D design is not trivial so only pursue this path if you feel you can learn it quickly.
Here’s an introductory course on 3D modeling and here’s one on injection molding.
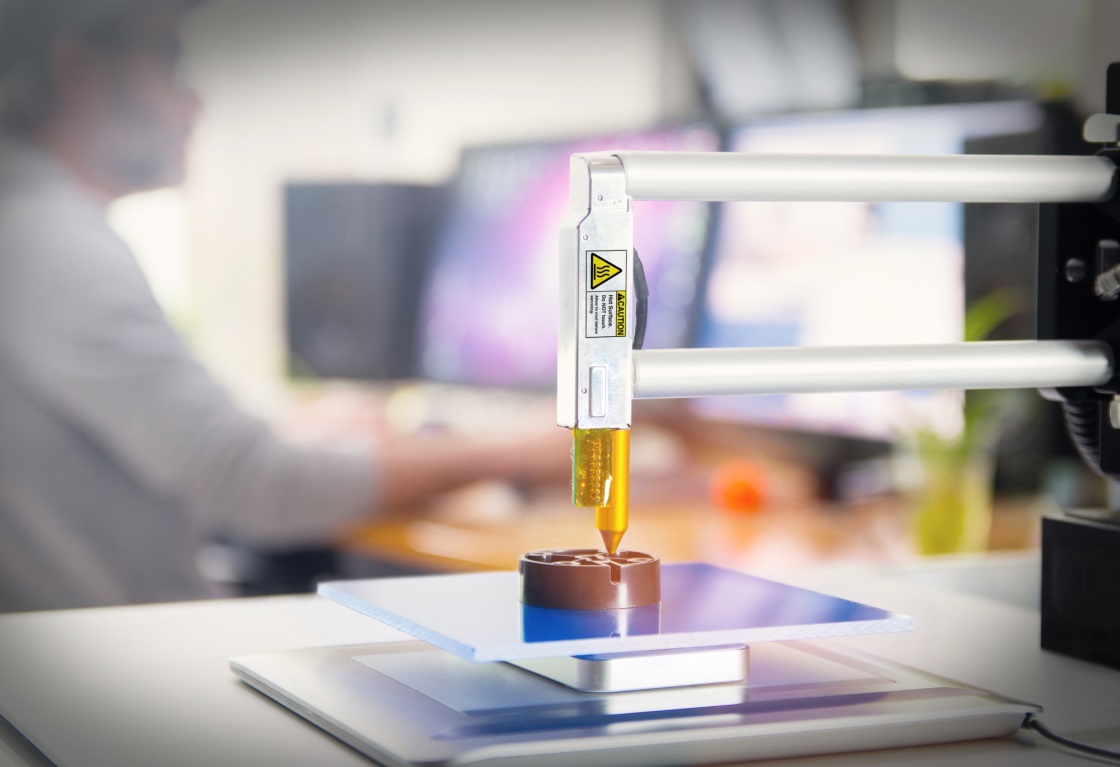
Order enclosure prototypes
Time to completion: 1 to 2 weeks (unless you have access to a 3D printer)
Now you are ready to order your first prototypes! This can be a very exciting step – you can finally hold your product in your hand!
Expect it to take a week or two for the prototypes to arrive if you are ordering it from a prototyping company. Of course, if you have access to a 3D printer, you can produce a looks-like prototype almost instantly.
If you expect to need many revisions to get your design ready then a 3D printer can be a very wise investment.
Don’t ever discount the benefits of having a prototype literally in your hands. The faster you can make that happen, the faster you will finish development.
Instead of spending months getting your 3D model just perfect, my advice is to instead simplify the design so you can get a prototype in your hands as fast as possible. This will provide you with so much valuable data that you can use to finalize the design.
Evaluate and debug enclosure prototypes
Time to completion: 4 weeks, most likely more
You will now want to evaluate your prototype and revise it as necessary.
With my own product, it took many design iterations to achieve the look and feel I was going for.
Plan for it to take at least 4 weeks to evaluate and revise your plastic enclosure. This timeline depends greatly on how many iterations you end up needing. Once again, debug is usually the most challenging step to forecast accurately.
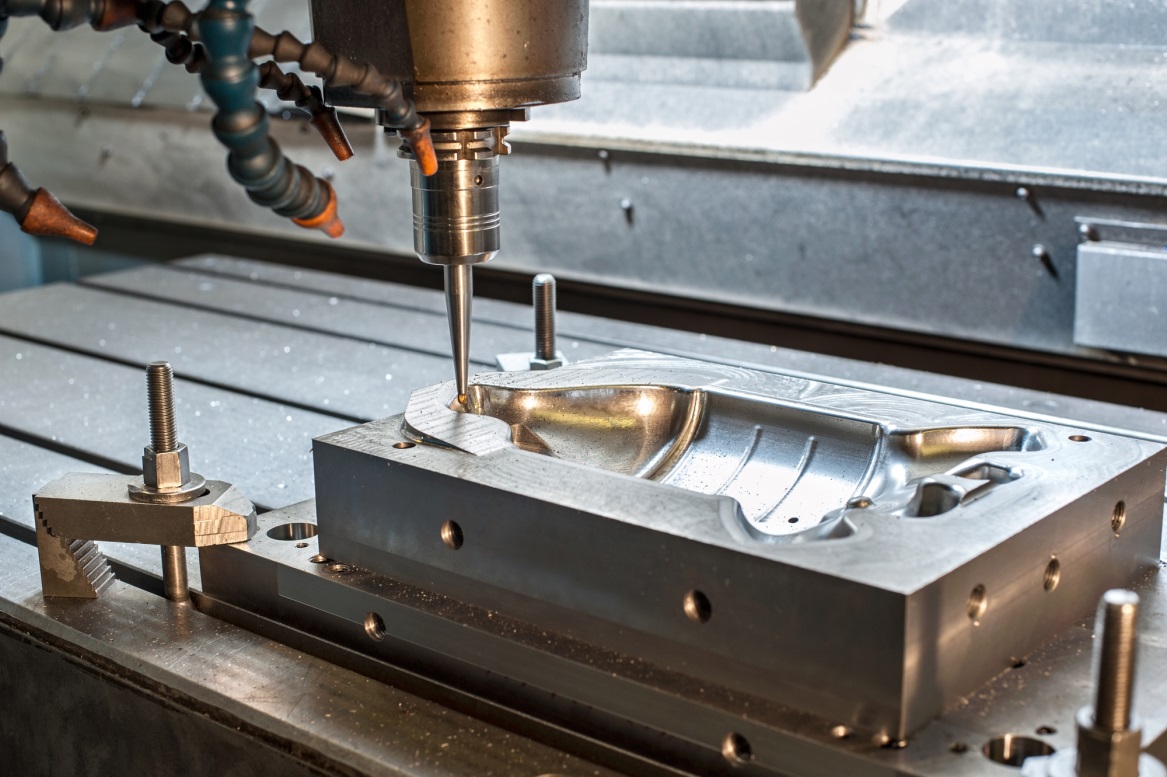
Prepare 3D model for mass manufacturing
Time to completion: 12 weeks
You finally have the perfect looks-like prototype, what’s next?
Now you need to prepare the 3D model of your enclosure for mass manufacturing using high-pressure injection molding. Expect it to take 1-3 months to prepare your product for injection molding.
Keep in mind, prototyping technology is very different from the injection molded plastic used in mass manufacturing. With 3D printing you can virtually create anything – any design or shape you can imagine. But injection molded plastic has a lot more restrictions.
You can save a lot of time and avoid headaches if you design your prototype from the beginning with the restrictions of injection molding technology in mind. This is part of the process known as Design for Manufacturing (DfM).
Stage 3: Develop Your Retail Package
Time to completion: 1 to 4 months
If you will only be selling your product online then the package requirements are much less challenging. In this case, the package only serves one function: protect the product during shipping. You should only need a couple of weeks in this case to finalize your packaging.
The package design becomes much more critical, and much more complex, when selling in retail brick-and-mortar stores. Here, the package also must serve another important function: convince the customer to buy the product!
If you are selling your product in retail stores, the retail package can be almost as critical as the product itself.
For online sales you can purchase stock packaging in various shapes and sizes. But for retail sales you will most likely want to create a custom package for your product.
Needing to develop a plastic custom package brings you right back to the previous steps you followed for developing your plastic enclosure. Your custom package will start with a 3D model, then need to be prototyped and tweaked as necessary.
Any custom shaped plastic in your packaging will also need to be designed for production using injection molded plastic technology.
Conclusion:
By this point you should realize that product development is an ultra-marathon not a sprint! You absolutely need to adopt a long-term attitude towards bringing your product to market.
Resist the urge to rush. Putting a defective or poorly made product on to the market can kill a new startup.
Most hardware products will need one and a half to two years to get to market.
Expect it to take another year or so before you are generating enough revenue to pay yourself a salary and reinvest in your company.
With certain choices you may be able to shave off a few weeks here, and a few weeks there, but rushing will usually cause more problems than intended.
The more complex your product is, the longer it will take to develop and manufacture it.
Time to market also depends a lot on you. Do you have the engineering skills to do the technical development work yourself, saving time and money?
Although no one will have your passion and sense of urgency, be honest about how much time you really have to devote to the startup.
Maybe hiring outside engineers would speed up your time to market? But, keep in mind this is a more expensive route to go.

Thanks! John, this is a great help. It brought a lot of clarity to structure my process for product sampling and development process.
Thank you so much Himanshu, and I’m happy to hear that it brought you a lot of clarity!
As always, a great read John.
Thank you Bob, I appreciate that!
Once again a very useful post, thank you John. I’m going through the ‘preparation for mass manufacture’ process at the moment and it feels like the point of no return because injection moulding tooling for the enclosure is the largest single outlay of the entire project.
Thanks Paul. Yeah almost everyone underestimates the cost and complexity of switching to injection molding for production.