How to Package Your New Hardware Product
Learn why retail packaging is overlooked but extremely important. This article details everything you need to know when designing packaging for your own consumer electronics product.
Article Technical Rating: 0 out of 10
Every electronic product basically consists of three parts: the electronics, the enclosure, and the package. In my experience most entrepreneurs focus on the development of the electronics, and to a lesser extent on the development of the enclosure.
But, very few entrepreneurs give the proper attention to the retail package until the last minute. That is a big mistake.
Packaging serves two primary purposes: sell the product and protect the product. If your product will be sold in brick-and-mortar retail stores then both purposes are equally critical.
In the beginning, when no one recognizes your brand or product, the package will have to essentially do all of the selling.
Because of this fact, some may even argue that in a retail store the packaging is just as important as the product itself!
On the other hand, when you sell your product online you don’t need the package to sell the product for you. The website will instead do that. So in this case the primary function of the package is to protect the product during shipment.
Types of Packages
You first need to decide what type of package is best for your product. I recommend going to a retail store that sells similar products to your own. Check out all the various packaging options that are out there.
Ideally, you should buy a few products with packages that you like so you can open them up to examine all of the fine details.
You will soon notice that most electronic products are packaged in either plastic clamshells or cardboard/paperboard boxes.
Clamshell Packages
A clamshell is a single piece container that consists of two halves joined by a hinge. The hinge allows the two halves of the package to close together around the product just like the shell of a clam.
Products that are small, that don’t consist of numerous parts, and are lower in cost will typically use a clamshell.
In basic terms a clamshell consists of three sections: the blister that is custom shaped to perfectly fit your product, the flat backside, and the graphic insert card.
Figure 1: Example of a clamshell for my own product.
Clamshell packages can be made of a variety of plastics. Just as with almost any custom shaped piece of plastic manufactured at volume, high-pressure injection molding is used to create your plastic clamshell.
Production injection molds are not cheap so a fully custom shaped clamshell can have some high initial setup costs. For more details on all the various development and scaling costs be sure to read this article.
Therefore, you may want to consider using either a fully stock clamshell, or a semi-custom one to reduce or even eliminate these costs.
The cheapest, easiest option is to simply purchase a stock clamshell that is already available for purchase. Numerous companies sell a wide assortment of stock clamshells.
The downside of a stock clamshell however is it will never look as good as a custom clamshell, and it will not hold your product as securely. Most higher-end electronic products are not appropriate for a fully stock clamshell because it makes the product look cheap.
A better option is a semi-custom clamshell package. In this case only the small blister that physically conforms to your product is custom molded. This allows the use of a stock mold with a custom insert for the blister portion which significantly lowers the cost of the mold.
Because of the requirement for some level of custom shaped plastic, and the need for an injection mold, you will need to create an accurate 3D model of your package. Many times the same designer that created the plastic enclosure for your product can also create the 3D model for your package.
Most clam shells are sealed shut to deter theft. The downside of this strategy though is it can make it very difficult for your customer to open your package.
How many times have you been frustrated trying to open a product locked away in a completely sealed plastic clamshell? I recently discovered there is even a term for this frustration called package rage.
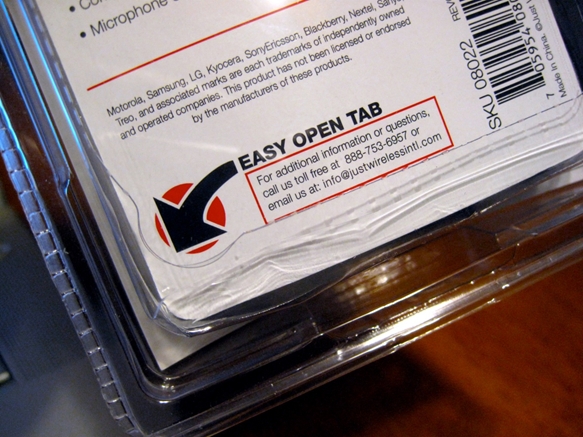
A good solution is to design in a pull tab on the backside of the clamshell that allows the buyer to easily open it to remove the product. Yet at the same time it shouldn’t be so easy to open that it encourages theft.
Figure 2: Easy open tab on the backside of a sealed plastic clamshell package.
Retail Boxes
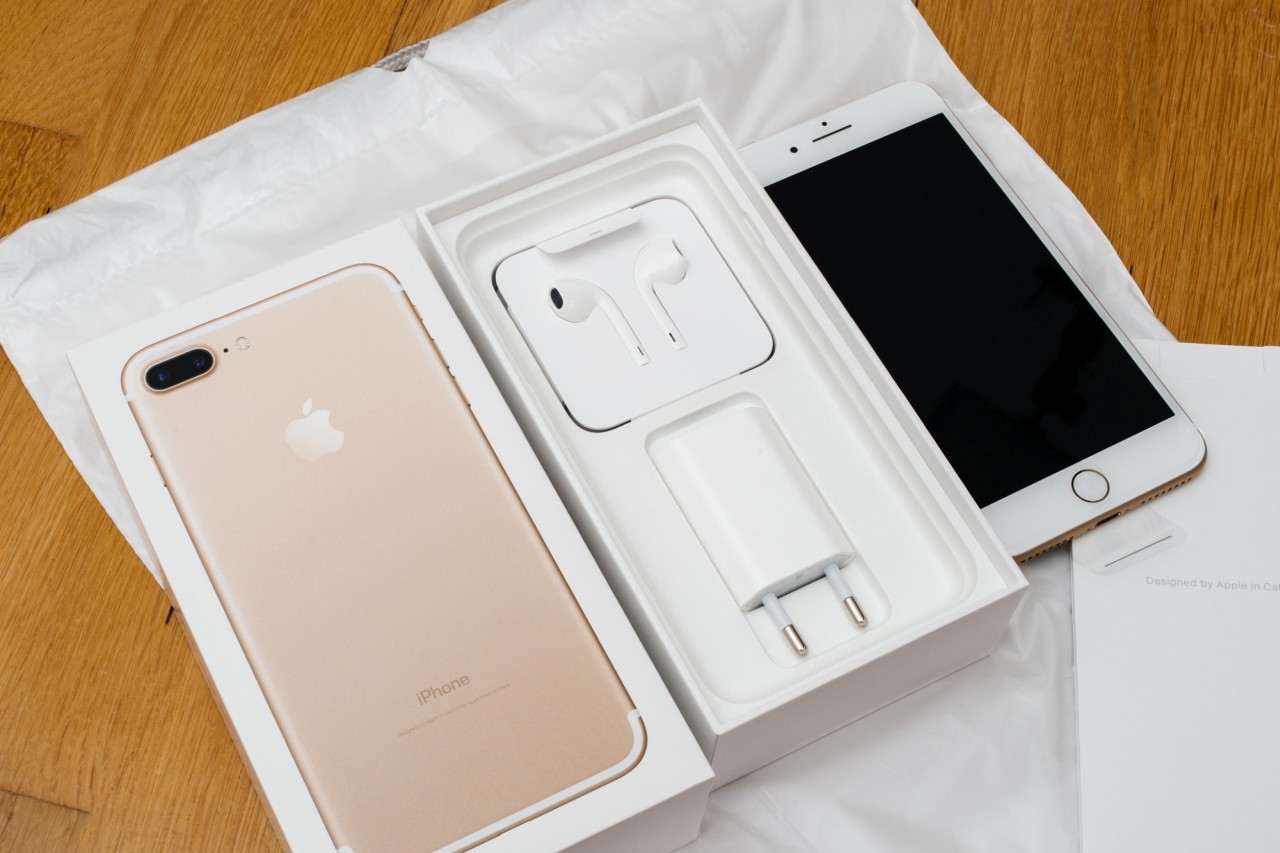
Products that are larger, have lots of separate pieces, and/or are more expensive will typically come in a box. If you want your product to look high-end then a retail box is the way to go.
Figure 3: High-end retail box with custom shape inserts to secure various pieces.
A retail box can either be a simple 1-color cardboard box, or a nicer full-color paperboard box. Be warned though that fancy, full-color boxes can be quite expensive, especially at low production volumes.
If you plan to initially sell your product via your own website, or via Amazon, then I would recommend you start with a lower cost 1-color cardboard box. When selling online the website is what convinces the customer to buy, not the package.
In this case the package primarily serves to protect the product. That being said, you also don’t want the buyer to immediately have a bad perception of the product upon arrival, so don’t make it too simple.
If your product consists of many separate pieces then a retail box design can become quite complex to securely hold all of the different pieces.
In fact, many times a custom shaped plastic insert is needed to snuggly hold all of the pieces inside the box. Other times, custom cut and shaped cardboard inserts can be used which eliminates the need for expensive injection molds.
Displaying Your Product in Retail
How do you want your product displayed in stores? Ideally, your product will have the largest foot print possible within a retail store to command the most attention from shoppers. A single small product can easily get lost on the shelf of a retail store carrying thousands of products.
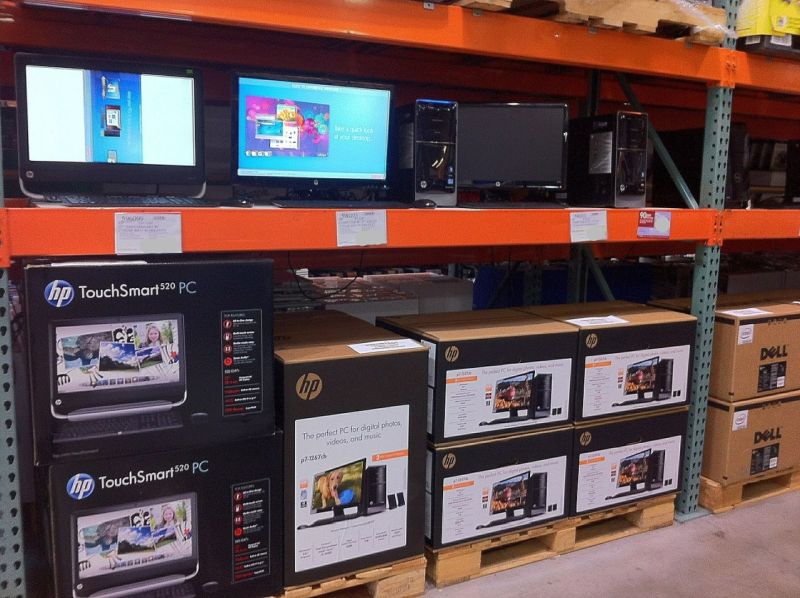
However, this is more difficult when you only have one product as opposed to a family of related products, unless you can get the retailer to agree to a large floor display. But that’s rare for a new product.
You could make your package larger than necessary so as to command more visual attention, but then you risk retailers turning you down because your unproven product takes up too much valuable shelf space. Retailers always fiercely guard their precious shelf space.
How your product is displayed in a store will determine in part what type of packaging you need. Should your clamshell have a peg hole at the top for hanging it? Or, should your product come with a cardboard display case, for placement at the register?
If your product is being displayed at the register, each individual product must fit into a slotted display case holding your product upright. Or, is your product sitting on a shelf in a box, necessitating bold graphics to grab a buyer’s attention?
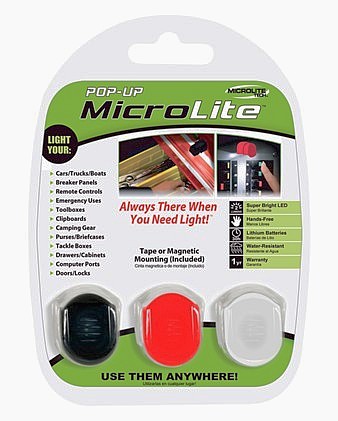
Let’s quickly look at a real world example. The hardware product I developed and brought to market about five years ago was called the Pop-up MicroLite (a small stick-on LED light designed to illuminate a surface).
It was individually packaged in a sealed, semi-custom clam shell with a custom cardboard insert. Although, initially for early prototypes to present to retailers, I simply used a stock blister glued onto a custom printed paperboard card with the artwork.
We shipped the Microlites to retailers in a cardboard box printed with the company logo. The cardboard box contained perforated edges to rip off the top half of the box. Inside the box was a plastic tray with individual slots to hold the Microlites upright in a row.
This allowed the retailer to place the boxed display at the register if desired, or on a shelf. The plastic clam shells also had peg holes, so the product could be easily displayed in a hanging rack or on a clip strip.
Graphic Design
Graphic design may just be the most important aspect of your package, and possibly even as important as the product itself. In retail, the graphic design is what sells the product, plain and simple.
Think about what your customer needs to know from the packaging. Does your product need describing? Do you need to talk about product features? Do you need instructions on how to use the product? Are batteries included or replaceable? What problem does your product solve?
You will need to bring on a graphic designer at this stage. You can provide the text, product photos, and desired graphics, but a professional will really improve the aesthetics of your packaging. Remember – the graphic design for your package is your way to convince the customer to buy, so give it the priority it deserves.
If you continue to look at real world examples of packaging, you will notice that nearly every product’s text includes a foreign language translation. You need to decide what languages to use on your packaging. This depends on where you plan to sell your product.
For a product sold in the U.S. you obviously will feature English text, but you may also want to include Spanish text in a smaller font. English and Spanish is a common language combo for products sold in the U.S.
If you will be selling your product in Europe then language choices for your package become a lot more complex.
Be sure to have a native speaker proofread any foreign language text. It’s essential they are native speakers living in the region you plan to sell your product.
You don’t want to make the mistake made by General Motors when they released the Chevrolet Nova to Spanish speaking markets. They had overlooked the fact that “Nova” translates to “no go” in Spanish.
Do you plan on selling your product in Canada? If so, Canada has its own product packaging requirements. They require by law that all text be in both English and French, and the text for both languages must be the same font size. For small products this can present a graphic design challenge since space will be so limited.
| TIP: If you haven’t considered selling in Canada, you might want to give this market a second look. Canada has a lot of the same big box stores as the U.S. – Home Depot, Walmart, etc. It can be easier to get your product into, say, Canadian Walmart stores than the U.S. counterpart.
This is because U.S. retailers get pitched new products more frequently than Canadian stores. If sales go well in Canada, you can work your way into the U.S. division more easily since you have an established sales history with the company. |
There may also be additional font size requirements. For example, Canada requires that the type height be a minimum of 1.6 mm for upper case letters, and 1.6 mm for lower case letters. If your package is 10 square cm or less, the type height requirement is reduced to .8 mm.
You need to also consider optional text and symbols for your packaging. Do you want to add the recycling symbol when appropriate with the type number for your plastic packaging? Is the product itself recyclable?

Or perhaps your product requires special instructions for discarding – many electronics and batteries need to be kept out of landfills, so you may need to add the symbol of a trash can with an X through it. Lithium-ion batteries are flammable so they also require special shipping instructions when sent by air.
Additionally, you need to decide where to print any symbols. Can they be stamped into the plastic clam shell, or are they best printed on your cardboard insert? Many stock clam shells may already come stamped with the plastic number and recycling arrows. If your clam shell is full customized you may be able to stamp all desired symbols into the plastic.
With many electronics, you may want to use a symbol or text showing that the product is lead free (required by law in California and Europe). You may also want to consider if your product qualifies for any additional markings such as the Energy Star symbol.
Here are links to current packaging guidelines for various regions: United States, Canada, Mexico, and the European Union.
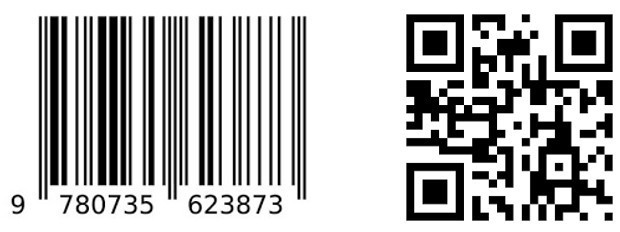
Figure 6: Examples of a UPC bar code (left) and QR code (right).
Lastly, all products need to include a UPC barcode. There are various online companies selling UPC barcodes, and they will be provided to you as a graphic image which you can add to your packaging.
You may also want to consider including a QR code as well. This matrix barcode allows a shopper to scan it with their phone which then automatically takes the person to your website with more details about your product.


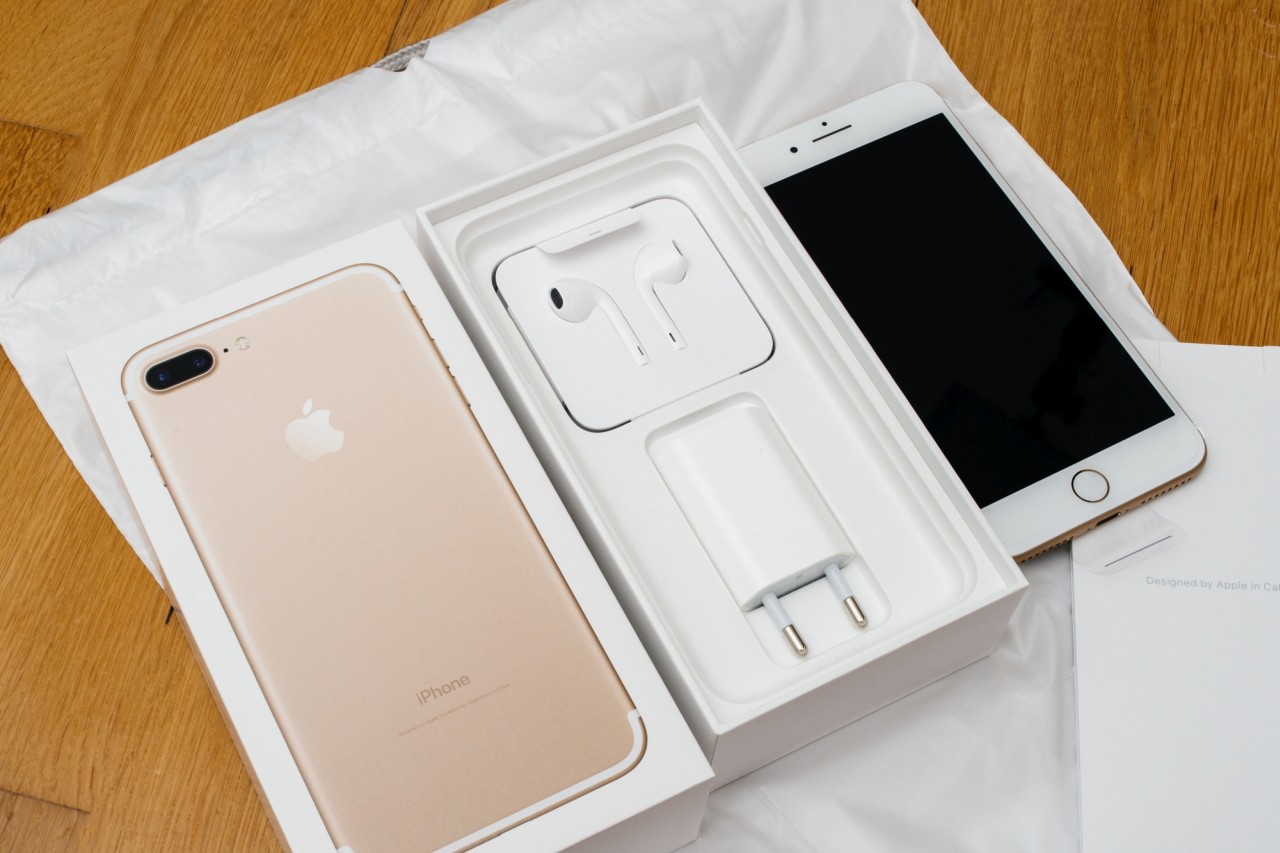
John, what do you think of the trend toward “beautiful” packaging that so many startups pursue? I’m talking about an outer sleeve, an inner box with a magnetic latch, lots of custom inserts to present the product and accessories, etc. Apple started the trend, but you see it everywhere now. While these expensive packages do create a nice unboxing experience, they can also be wasteful and very expensive.
Your thoughts?
Hi Dave,
I would personally avoid them until much later when the product is already successful. Of course, this is especially true if you begin like many startups selling online since the package only needs to protect the product, not sell it, when online.
Those beautiful packages are extremely expensive and take a long time to develop. Most startups don’t have the profit margins initially to justify such expensive packaging.
Thanks for your comment!!
P.S. I got your email, thank you, and I will reply asap.
Really insightful. Thank you John.
Your articles are inspiring.
Have any article on how to build an hardware lab.
I mean a small scale lab for an hardware startup
Thank you Victor, I’m glad you found it insightful. Sorry I’ve not written anything about setting up a lab, but something I may consider in the future. Thanks again!