
Why Testing Your Product is Just As Important as the Product Itself
Learn what needs to be tested, how to test it, and how to design your product to make it more easily testable so only high quality units ever ship to your customers.

This is a guest post by Craig Rettew of Zepto Industries who is an electrical engineer bringing his own product to market. Craig has extensive experience in product testing and buiding test fixtures.
In the 1997 movie Contact, starring Jodie Foster, there is a line in the movie that I always think about when it comes to manufacturing a product: “First rule in government spending: why build one when you can have two at twice the price?”
It’s meant as a jab at frivolous government spending but I believe the government was right to buy themselves some redundancy. I’m sure the fictional government in this movie weighed the risks of spending twice the amount of money to build a second alien space-time travel machine.
The point is, redundancy, fail safes, backups, testing, and double-checking are critical. This is especially true when manufacturing hundreds, thousands, or millions of a product that you’ve put so much time into, to get a high quality, functional product in your customers’ hands.
Design for Testability
Electronic design embodies two parts; the design itself and testability of the design. Sure it’s attractive to focus on the features and how your widget will wirelessly alert your smartphone of the current status of your foot odors (patent pending), but that’s only half the battle.
The one prototype you made works flawlessly because you’ve been so tightly coupled with it for so long that you’ve mitigated any issues that you can see on a sample of one.
You’re happy with your prototype and you want to take it to the next level, so you get a few in the hands of friends and family. Let’s say you want to make 50 units, great!
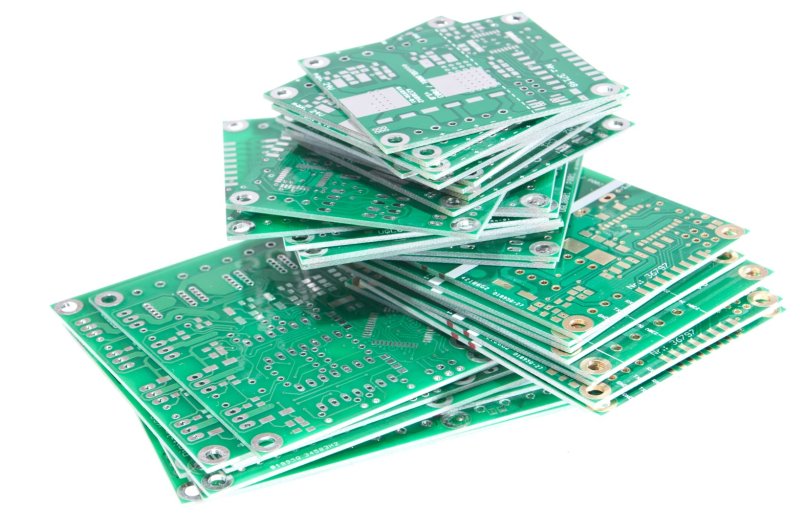
You decide that it’s best that you make the first 50 yourself, so you get your bare PCB made, buy all of your components, and you have your soldering station ready to go.
You spend a full day meticulously soldering on 0402 resistors, QFN packages, and a chip antenna on all 50 PCBs. Staring at all 50 assembled boards, you know that they need to be tested to make sure they’re going to work before they’re sent to friends and family.
Luckily, you knew this was coming and designed with testability in mind from the get go. Referencing your block diagram of your design, you added test points on all of the critical power and signal sections of your design to allow easy probing or test fixture interfacing (more on this later).
Test Early, Test Often
Many manufacturers have built-in processes that make sure the design that’s being manufactured is exactly what you provided. During the PCB fabrication process, there are several steps to mitigate any defects.
PCBWay has an excellent explainer on the entire process.
Two of the most important steps are Automatic Optical Inspection (AOI) and Electrical Test.
AOI will visually check the design against the artwork that was provided and the Electrical Test will test for any erroneous open or short circuits by physically probing the PCB.
You’ll be happy that your PCB went through a battery of tests before it came to assembly. Whether you’re assembling the PCB yourself or relying on the manufacturer, it’s important to know that your hardware is manufactured as you intended.
If your manufacturer assembled the PCB, they’ll usually have another inspection process to make sure everything is right. Another AOI is performed to check solder joints, part orientation, and any other defects.
Sometimes, if there are components that have complex footprints such as BGAs, an Automated X-Ray (AXI) will be performed to confirm that the solder joints look good under the part.
What to Test
Power
Obviously, every design will have its unique features but there is usually one commonality and that is how your board is powered. You’ll need to confirm that your design is getting the correct voltages. If your voltages are wrong, there’s no hope for the rest of the design and you’ll need to troubleshoot before moving.
If your manufacturer did a good job with their fancy automated machines, you should be able to power your board without letting out the magic smoke. If the smoke gets out, your electrical problem just turned into a thermal problem. You can just hand it off to a thermal engineer.
Jokes aside, doing some initial probing with a simple multimeter to confirm that all the voltages in your design measure what you expect will be the first step to making sure the rest of the design will function properly.
Microcontrollers, processors, etc.
A large majority of new designs will include some kind of brain. Microcontrollers are cheap and can do wonderful things but you also need to make sure they are working properly.
A bare microcontroller needs to be programmed with your code at some point. The chip manufacturer can do this before the part is even soldered onto the board, for a fee or additional lead time or both. But it’s also important to have a way to program with an In-System Programmer (ISP).
For the initial units, it’s best to program them yourself and have a way to debug any issues that might arise by using an ISP while you interact with the circuit.
Signals & Sensors
Most designs will include some kind of signal whether it’s being generated as an output from your microcontroller or coming from some sensor.
Most likely, you’ll need to program a microcontroller before your design is working as intended. Let’s assume that your microcontroller is programmed and it’s communicating to all the peripheral components.
At this point, you can probe for voltage levels and waveforms, interact with buttons, check that LEDs light up correctly, and confirm that any analog voltage levels meet your specifications.
User Interfaces
Users are not going to care what’s happening “behind the scenes” of your design. They will most certainly care if a button is not working or an LED is not behaving like the user manual says it would.
It is imperative to thoroughly test all the user-facing components. This includes buttons, LEDs, screens, capacitive touch, or whatever the user will be interacting with to make your product work for them.
How to Test
I implore you to visit a manufacturing facility that produces similar products to what you’re bringing to market. There is no better experience to understand the behind the scenes of producing a hardware product.
Do this as early as possible in your design phase because you might learn something that will save you time and money later on.
Someone in the Hardware Academy shared this amazing video of a popular tech YouTuber walking through a manufacturing facility, detailing what it takes to produce a smartphone.
There is specialized equipment for software testing, camera quality control, accelerometer exercising, alignment, gluing, dropping. A staggering 100+ people will touch every single phone before it leaves the factory!
It’s amazing to think that this is just one of the many smartphones out there, only to get updated every year.
Producing a smartphone takes a small army of engineers and manufacturers. Your product may not be as complex, but the principles still hold.
The holy grail of producing anything is getting your product into customer’s hands cheaply and quickly, and assuring that it is high quality. In reality, it is nearly impossible to achieve all three.

Test Plan
Much like creating a block diagram of what you want to design (the pre-design phase), it’s a good idea to jot down everything that needs to be tested in your design. This allows you to see the big picture and even brainstorm how something will be tested.
A test plan should be done early on in the design phase as well. This will force you to think about what you’ll need to physically lay out on your PCB in order to facilitate efficient and robust testing.
Test Points
Your test plan should tell you which test points you need to add to your design. A test point is a physical location on your PCB where you or a test fixture can easily probe to take a measurement.
You don’t want to rely on probing the pin or pad of a component for various reasons. I like to make my test points 1mm in diameter and space them out from each other at least 2.54mm.
This allows plenty of surface area and space for manual or automatic probing. I tend to also place them on the bottom side of the PCB for easy access.
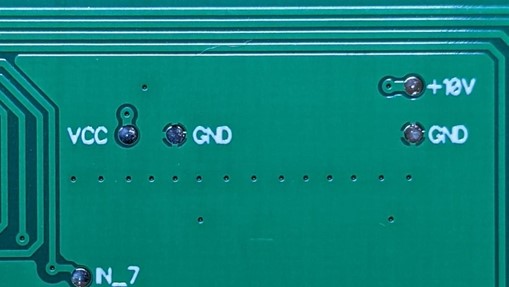
Example of test points on the backside of a PCB
In-System Programming
I had mentioned ISPs in the section above, but there are several ways to include this interface in your design. Some designs such as the Arduino Uno have a 6-pin header soldered on the board in order to connect a programmer.
This is good for a development board but you probably don’t want the added cost of the connector in your finished product. However, you need an efficient way to program each board without soldering or desoldering a connector every time.
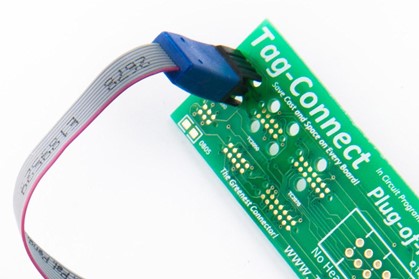
One of my favorite ways to interface with an in-system microcontroller is using the Tag-Connect system. No extra components on the board, tiny footprint, and high repeatability. I use this system on all my designs that need programming. I can keep the cable connected to my board if I need to troubleshoot anything.
Test Fixtures
For lower quantities of your design, it might make sense to manually test each board yourself by hand. If you have people to help you out, even better.
Make sure you have a robust test plan and each board follows the plan to a T. Humans are typically bad at repeatability and human-error is a real thing, keep that in mind.
The other approach, usually for larger quantities, is designing and producing an automated test fixture.
As you saw in the smartphone manufacturing video above, there were several specialized test fixtures that performed very specific tasks. These fixtures can either be designed by you or the manufacturer for a significant cost.
A test fixture becomes a product in and of itself. It may not be as flashy or aesthetically pleasing as the product you’re producing but it certainly can be a complex design, if not more complex.
Construction
I’ve seen test fixtures made from 3D printed parts and I’ve even seen test fixtures made out of 2x4s and plywood. No matter what the test fixture is made from, the most important aspect is that it’s robust and repeatable.
Most commonly, a test fixture will involve spring loaded pins, sometimes called pogo pins, and a way to clamp the unit under test (your board) against the pins. The good fixture will mechanically align your board to the pins for max repeatability.
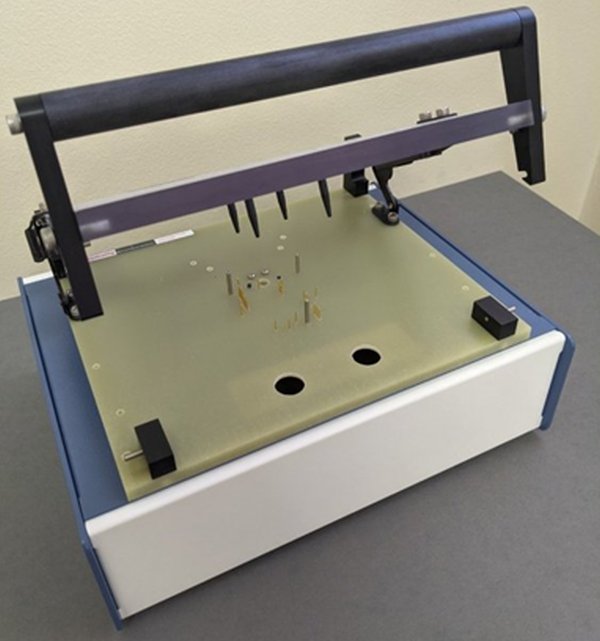
Example of a clamp down test fixture
Depending on the quantities you’re hoping to produce, it’s probably best to start with a fixture that can test one board at a time.
If you’re producing a ton of product, you might consider testing an entire panel of boards, which increase the speed but also increases the complexity of your fixture significantly.
Automation is King
Aside from the pogo pins that interface with the test points on your board, there are other aspects to consider to make your automated test as robust as possible.
If your design has buttons and LEDs, there are two approaches to confirm these are working properly.
The first approach is to just have the operator manually push the button and get a visual on the LED. Following your test plan, they would know when to press it and whether the board passed or failed.
The other approach is to make that process completely automated. In one of my test fixtures, I went as far as using two solenoids to physically press the buttons to make sure those worked. A color sensor was also used to make sure the LED was the right color.
This increased complexity in the design, but paid dividends in the long run since the test was quick and repeatable, taking the human out of the loop.
Testing Interfaces
More often than not, the test fixture will need to run from a computer. The computer executes the program that you write to perform the necessary tests that tell the operator whether your board passed or failed.
My approach to test fixtures is that it should be as simple as possible for the operator. The operator should be able to push a button, allow the test fixture to perform all the tests, and then gets a pass or fail indication at the end of the test. Failed boards go in one pile, boards that pass go in a different pile.
I have used a Raspberry Pi in almost all of my test fixtures. It’s a compact computer that has an easy way to interface with peripheral devices via the header with all the GPIO, power, and communication available.
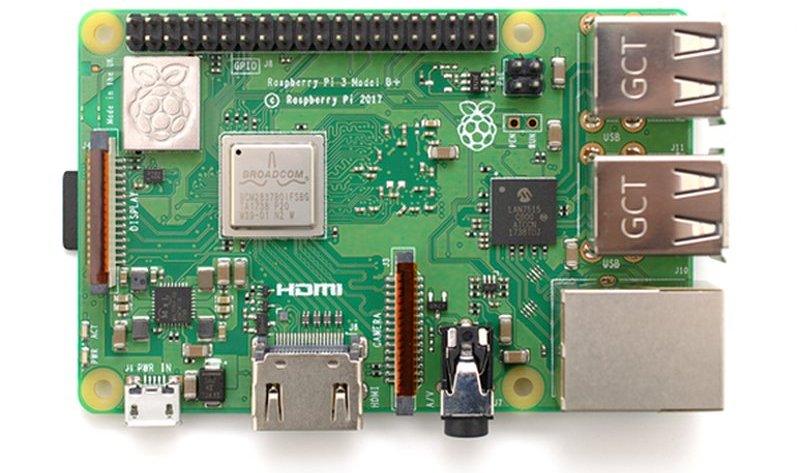
Linux is the go-to operating system and if it’s good enough for Mars, it’s more than enough for a robust test fixture.
Typically, there will be an interface board that will extend the capabilities of the Raspberry Pi, which will then interface with your unit under test (UUT).
The easiest way to interface with GPIO is writing your test fixture program in Python. The libraries are plentiful and it’s fully capable.
Supplying your own computer eliminates any compatibility issues with your manufacturer’s computer that could be using an outdated operating system. You can then set up the computer properly before it ships out.
Another benefit of including your own computer is the ability to remotely update the test fixture or set up a web interface to get testing data in real time. This will allow you to jump on any issues that might arise. It may take a little configuring of the network on the manufacturer’s end, but it’s worth the step.
Redundancy
Like the engineers did in Contact, you should plan on having at least two identical fixtures.
Imagine you’re manufacturing overseas and your single test fixture breaks down. This halts the entire production process. You’d have to produce another one and transport it to your factory. Yuck.
Having two test fixtures in your manufacturer’s hands increases speed and efficiency and also limits the risk of production coming to a screeching halt.
It may also be beneficial to have a third fixture that you keep yourself for any troubleshooting so you can work in parallel with your manufacturer.
Make it Easy, Make it Obvious
Picture yourself using your test fixture to test thousands of boards. You would want the process to be as efficient as possible, because time spent on testing factors into the cost of labor when producing your product.
You want to be able to press an obvious “go” button to start the test, and you want an obvious pass or fail. Not only that, you want to know when the test fixture is ready to go and when it’s in progress.

I’ve used a combination of large green, red, and blue LEDs to indicate what’s happening. I’ve even heard of some designers making their test fixture into a game or adding a jingle at the end of the test when it passes.
No matter what you do, make it easy and obvious.
Conclusion
I enjoy designing test fixtures (yeah, that’s right, I said it)! I think of a test fixture as a little robot employee who is the last line of defense to release a quality product to the market. It’s your little buddy that doesn’t accept anything less than perfection and it doesn’t complain, sleep, or spend time on social media.
I’ve detailed testing a circuit board but most of the time, the circuit board is only one part of the product. When the final product is assembled, it’s wise to perform a final test.
Testing a circuit board is similar to testing a fully assembled product. You can make it manual or automated, but the key is to make it robust enough to ensure only quality products ever ship to your customers.
The old adage still holds true for test fixtures; garbage in, garbage out. Put as much thought into your test fixtures as you do your product and your quality control issues will be negligible or nonexistent.
Invest the time upfront and you’ll be rewarded with less returned product, or bad customer reviews, which will affect your brand and your bottom line.

This is one of those topics that is really difficult to find a good introduction to. Thank you John for the clear and complete intro!
Thanks Dave, but Craig Rettew gets all of the credit on this one:)
This enlightening, very wonderful, this is the approach for best results thank you Craig, thank you John Teel