
How to Connect an ESP32 WiFi Microcontroller to a Raspberry Pi Using IoT MQTT

One of the most important features of an Internet of Things (IoT) device is its ability to “speak” to the network.
The steps a device must take to communicate successfully with another device is called a communication protocol.
A protocol is a set of official procedures and rules that govern a particular affair. In terms of IoT devices, a communication protocol lays out the procedure that devices must take in order to send/receive information.
Communication protocols are split into two categories, Network Connection Protocols and Data Communication Protocols
Let’s imagine that we are laying out a new city. First we begin with an empty lot of land somewhere.
Second, we must place physical roads, with different sizes and weight capabilities, to enable people to move into the new city.
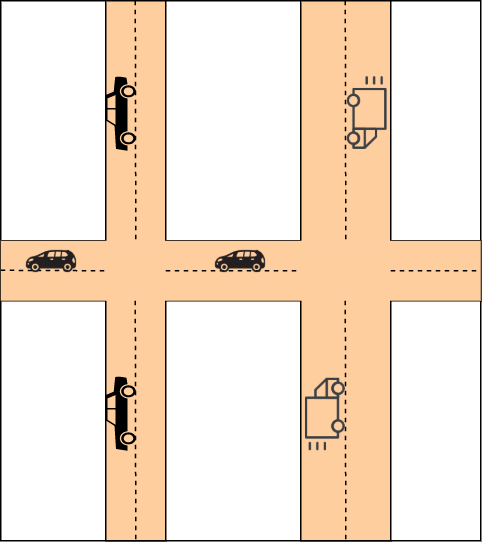
As seen in the figure below, I’ve laid out the roads. The roads in our analogy are the Network Protocols. Network protocols are the physical layers of the network. In an OSI Model they are usually labeled as the Physical layer, DataLink layer and Network layer.

Now we need to populate the roads (Network protocol) with cars and people (application data protocol). As you can see in the updated figure below, different vehicles can fit different routes and vice versa.
In our case, the network protocol and the data protocol work hand in hand to facilitate a communication channel (roads) that allows data to travel through the internet to their intended destination.
As a quick refresher, an Open Systems Interconnection (OSI) Model outlines 7 layers (steps) that computer systems must use to communicate over a network. The following figure shows these 7 steps and an example of communication protocols that are used for the layers.
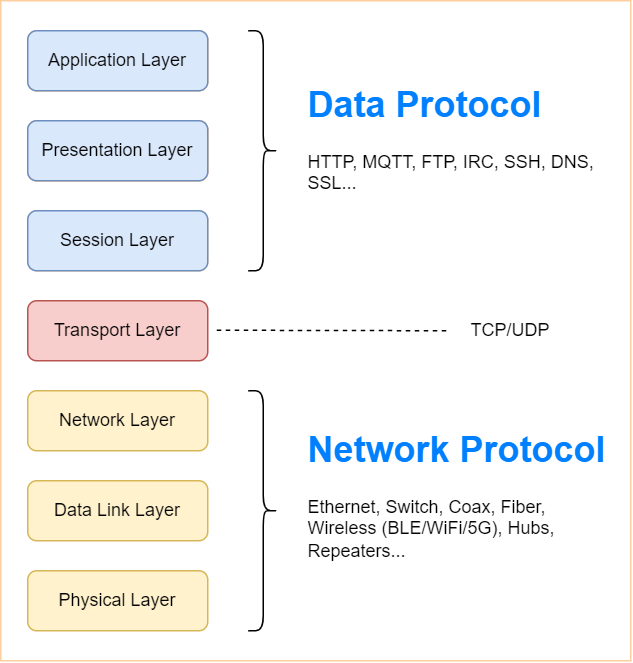
There are many protocols that are being used today that facilitate the network and the application layer of the OSI Model. In this article, we will focus on the data protocol part and in particular the Message Queuing Telemetry Transport (MQTT) protocol.
In most applications, when designing or programming your IoT device, the communication module that you are using will take care of the Network protocol, and you will only need to focus on the application and data protocol.
To demonstrate the use of MQTT in a real application, we will show how to connect an ESP32 Development Module to a Raspberry Pi over a local network, and communicate via MQTT to send lightweight data.
MQTT is a protocol made for IoT devices. It allows for lightweight communication between devices and servers. The protocol is well documented in the official MQTT website.
In simple terms, it allows a device to subscribe and publish to topics (endpoints) that facilitate sending small data over the network protocol.
An MQTT broker is used as the manager that routes all the messages to the rightful owners (subscribers) and accepts publishing messages from different devices. Every MQTT communication mechanism must start with planning the topics that are to be used for both the server side and the device side.
In our demo, we will use a Raspberry Pi as our MQTT broker (server) and an ESP32 as the publisher to publish light sensor data to the MQTT broker topic as seen in the following diagram.
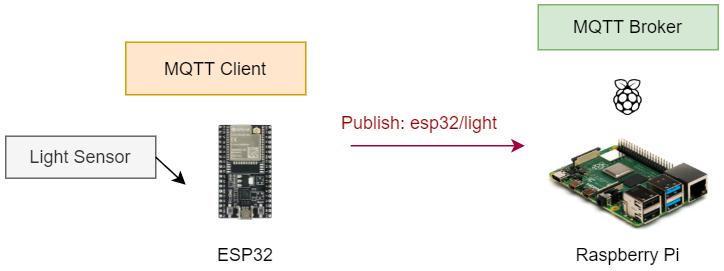
It is generally a good idea to begin with a flow diagram as seen above with the planned topics and clients. We will use a light sensor to demonstrate the idea of using MQTT to push data to the MQTT broker on the Raspberry Pi.
In a real application, security is a third layer that must be considered. In our case we will not worry too much about the security since it is running in a local network with no external connection.
But in cases where you expose your broker to the internet, you want to keep your network secure.
We will break down the demo into the following sections:
Raspberry Pi:
– MQTT broker
ESP32:
– Light Sensor
– MQTT client
– WiFi connection
Raspberry Pi
The Raspberry Pi will act as the MQTT Broker server. It will route all of our messages to their appropriate subscriber and accept messages from publishers.
Step 1
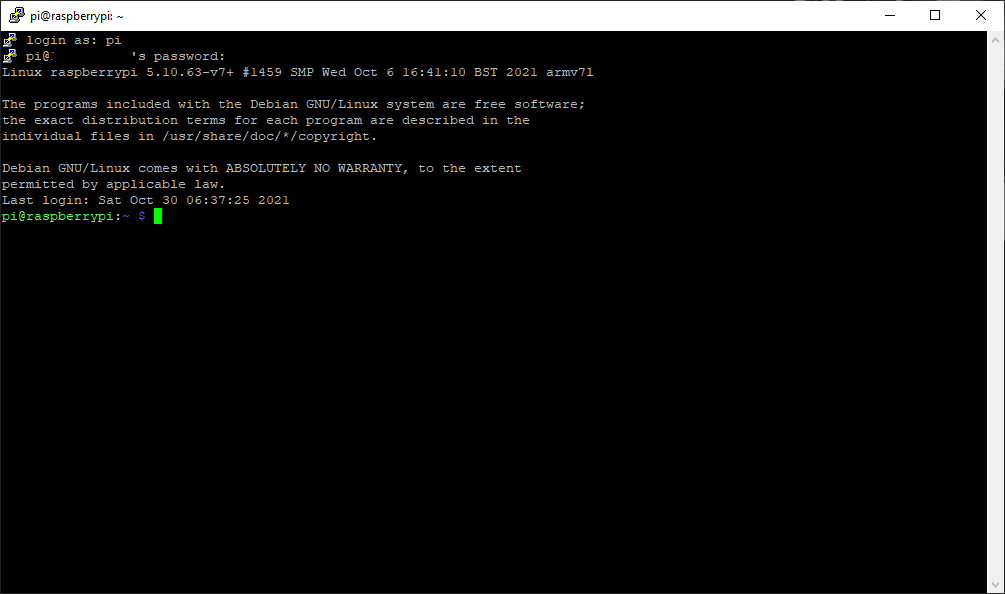
To begin, enable SSH on your Raspberry Pi in order for you to access the terminal from your host PC. If you are using Windows, be sure to install an SSH client such as PuTTy.
Find your Raspberry Pi’s IP address and SSH into it. There’s a great article on how to do this here.
Step 2
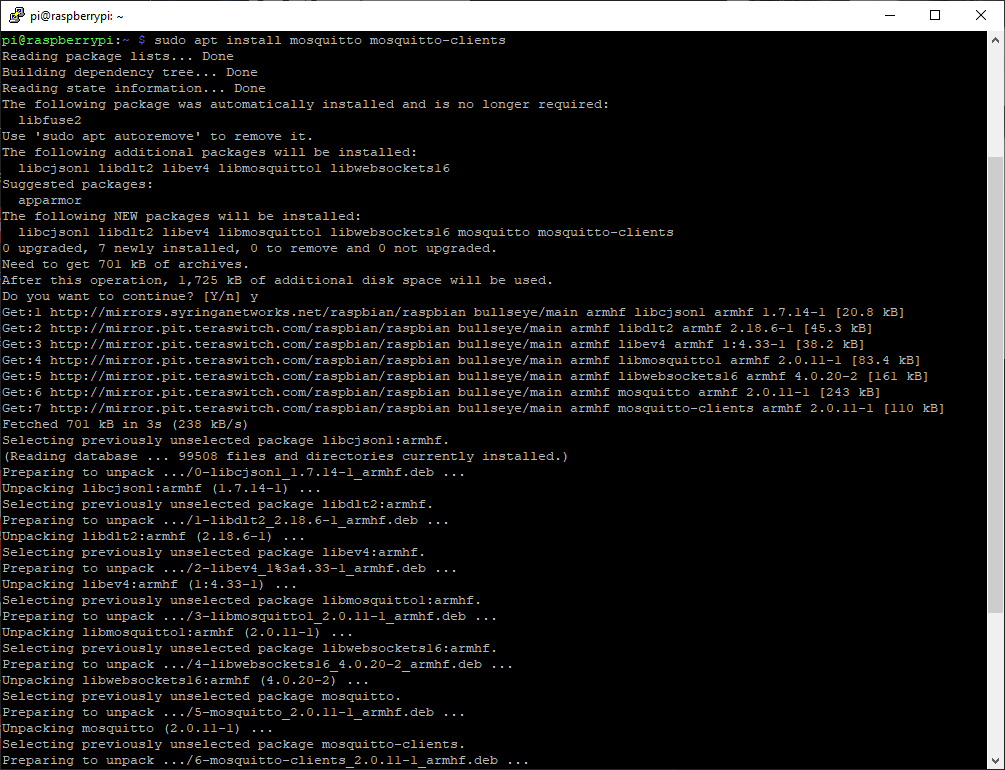
Install mosquitto and mosquitto-clients to start an MQTT broker server and to test the server with the mosquitto-clients. Use the following command to install mosquitto:
sudo apt install mosquitto mosquitto-clients
Step 3
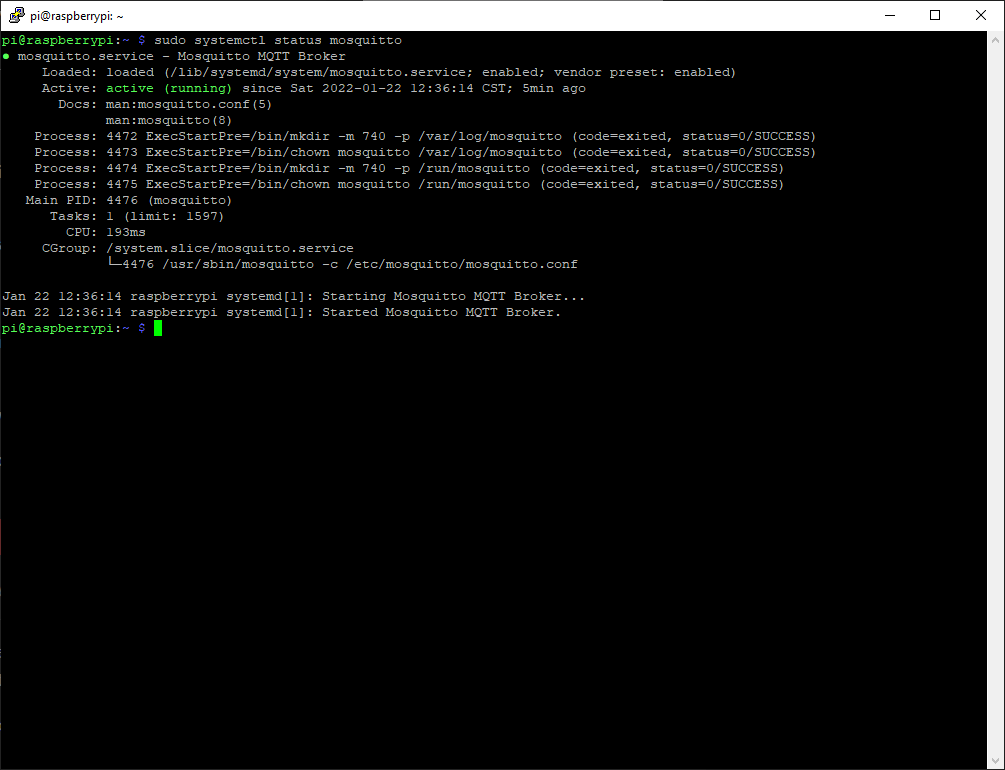
At this point the mosquitto MQTT broker service should be running. To confirm this run the following command:
sudo systemctl status mosquitto
If you see the green “active (running)” status, that means it is running in the background and your setup is good to go thus far.
Step 4
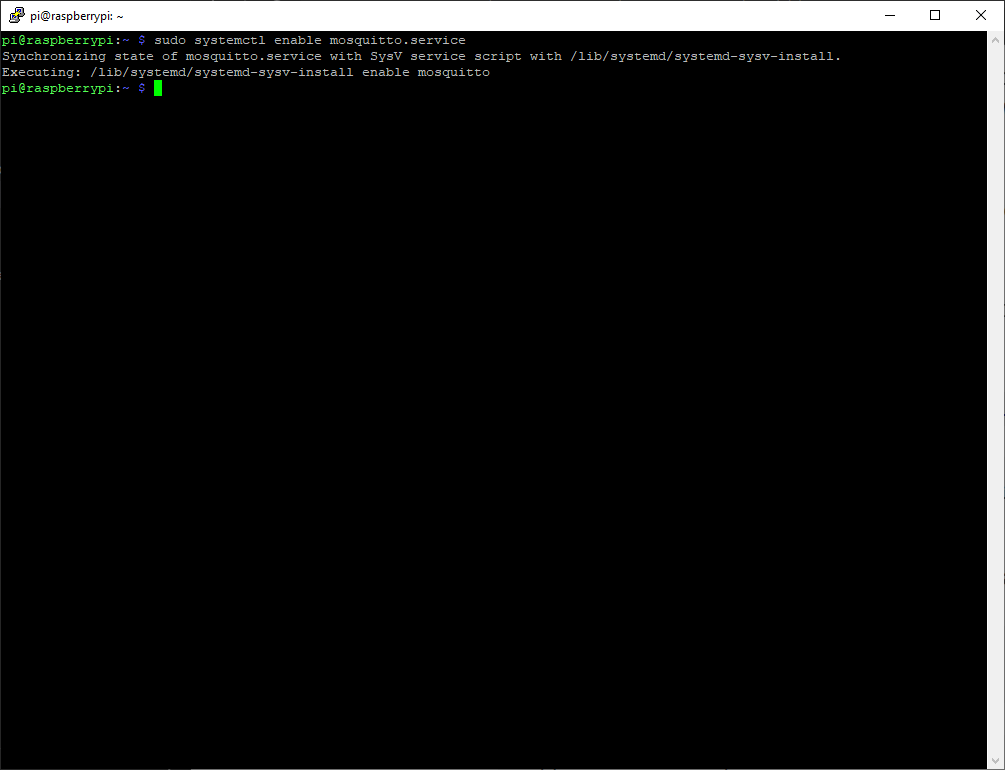
To autostart the mosquitto service every time the Raspberry Pi restarts, run the following command:
sudo systemctl enable mosquitto.service
Step 5
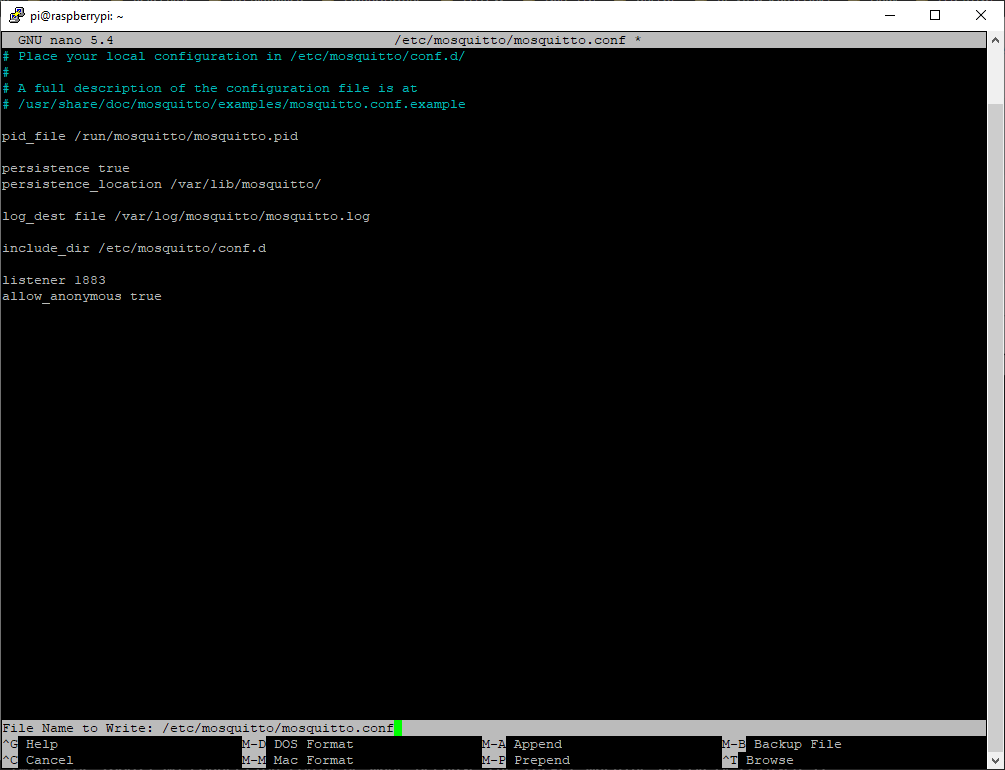
Configure the mosquitto conf file so you are able to connect to it via the local network by enabling port 1883.
Start with the following command to edit the mosquitto.conf file:
sudo nano /etc/mosquitto/mosquitto.conf
Then, move to the very end of the file and enter the following lines:
listener 1883
allow_anonymous true
Next, press CRTL-X to exit and then reboot your Raspberry Pi.
Step 6
Keep a note of your Raspberry Pi IP address so you can use it as the hostname for all the MQTT communication.
Step 7
Let us go ahead and start a subscriber that will show all the messages that have been sent to the topics “esp32/light,” in order to see the messages the ESP32 will be sending to that topic. To do this, run the following command:
mosquitto _sub -h <RPi IP Address> -t “esp32/light”
Be sure to replace the <RPi IP Address> with the IP address of your Raspberry Pi.
ESP32
Before starting with the ESP32 board, be sure to have the following prerequisites completed:
- You will need an ESP32 based Development Board
- Install and setup the development environment for ESP-IDF using the these detailed instructions (use the VS Code Extension)
- Purchase a light sensor – preferably this type of photoresistor.
- You will also need a breadboard
Step 1
Build the following circuit on your breadboard:
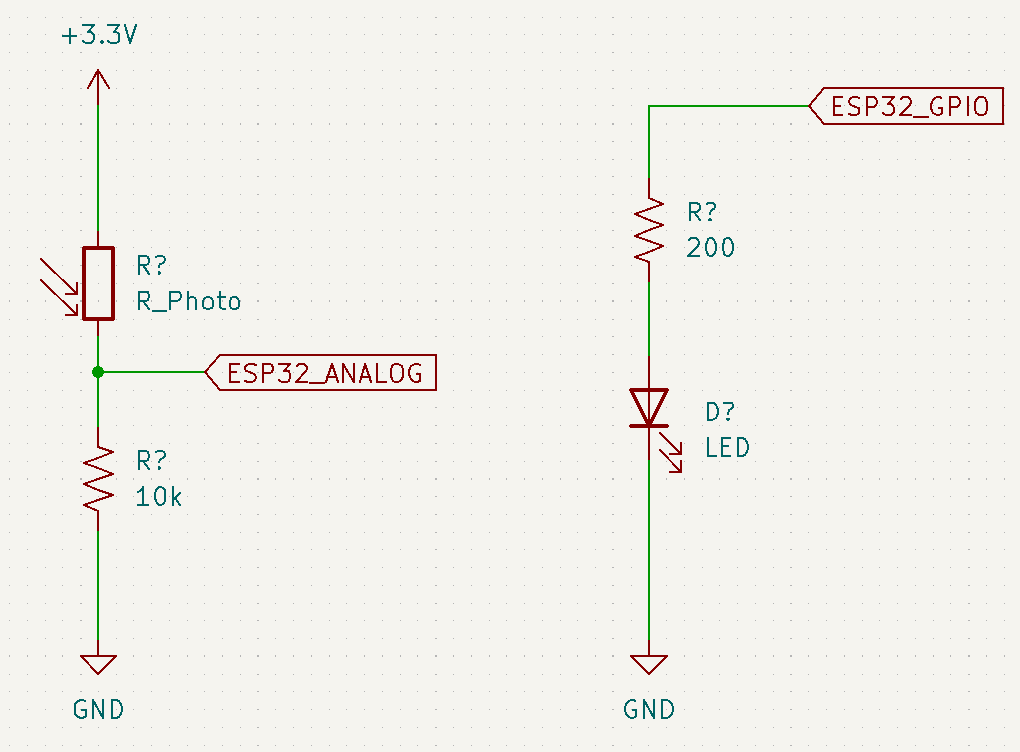
R_Photo here represents the photoresistor, in series with a 10k ohm resistor to form a voltage divider. We will need to make sure that the photoresistor output is connected to an ADC input of the ESP32. In our setup, I used the following pins:
| ESP32_ANALOG | GPIO34 |
Step 2
Git clone the example ESP-IDF code from here.
Step 3
Open the folder from your VS Code and change the target device to esp32. Then, change the serial COM port and start the configuration settings.

Step 4
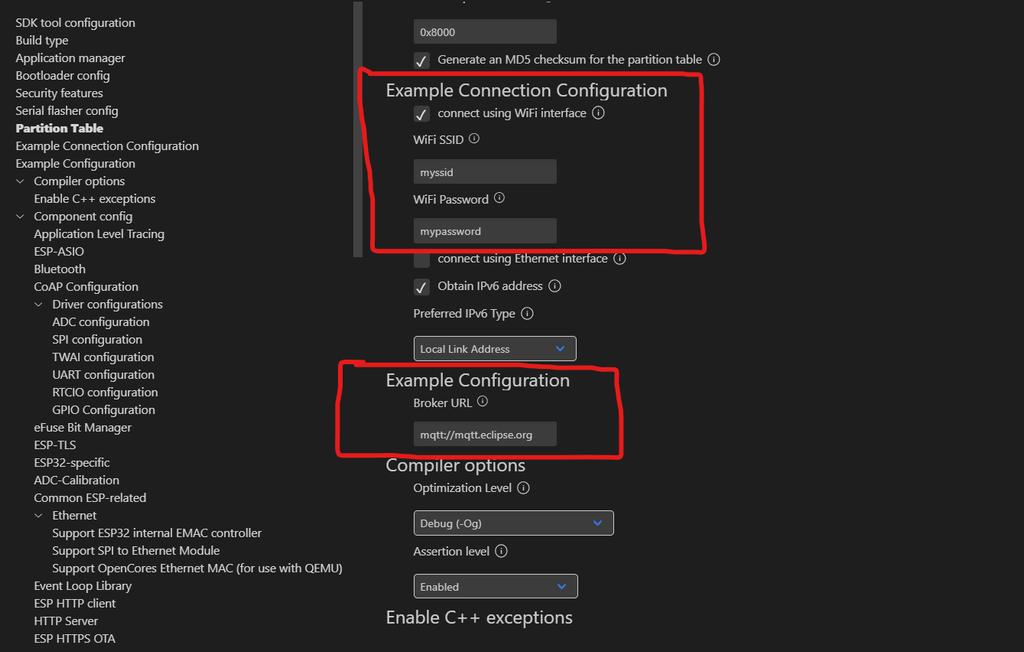
Under configuration (menuconfig) go to the Example Connection Configuration and Example Configuration, enter the following:
WiFi SSID: Your WiFi SSID name
WiFi Password: The password of your WiFi network
Broker URL: Enter the Raspberry Pi IP in the following format “mqtt://<ip address>
Step 5
Save the configuration and then build, flash and monitor the firmware on to your ESP32 board.
Step 6
You should begin to see data flowing into the MQTT broker SSH window that you setup earlier.
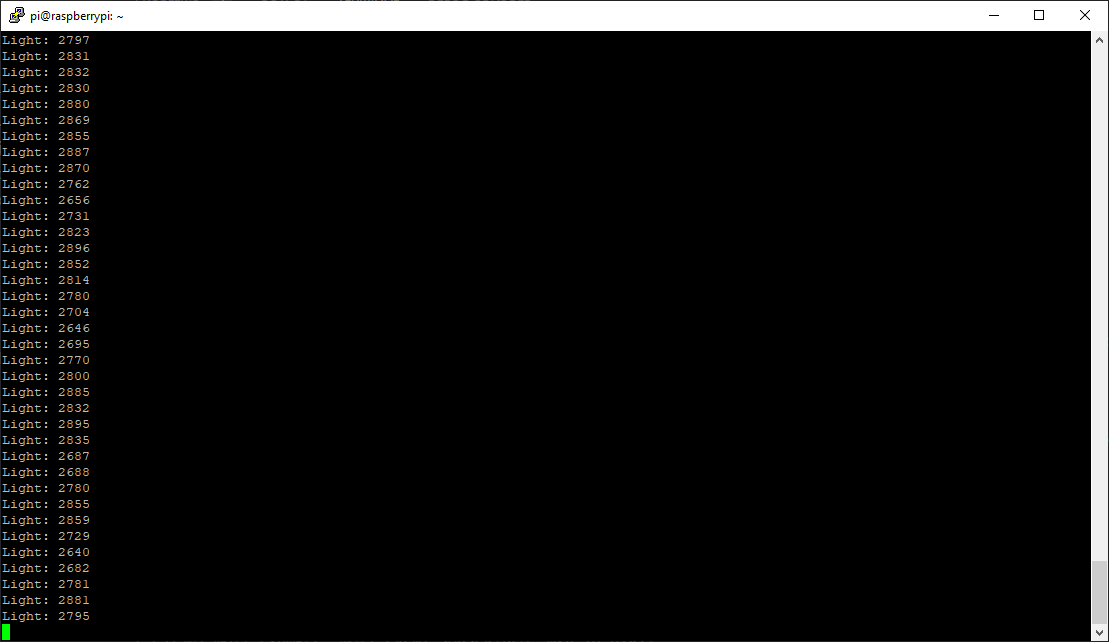
What you are seeing is the ADC data that is being published directly from the ESP32, via your local network, to the MQTT broker on your Raspberry Pi.
Conclusion
This demonstration is easily portable into any existing applications that you plan to work on. If you want to collect data about a specific process or system in your house, you are able to do so easily with this approach.
All you will need to work on is the processing and acquisition of the data from the sensor onto the ESP32. There are two types of sensor communication, analog and digital. We worked on an analog sensor in this article.
Regardless of the protocol of the sensor, it is easy to send the raw sensor data to the Raspberry Pi with this approach.
Written by Ahmed Al Bayati, who has been designing and deploying Internet of Things (IoT) devices for the past 5 years.
